Picture a February morning on a lot that drops toward a creek or a lake. Upstairs, the kitchen looks out over the snow. Downstairs, the family room gets the same light through full-height windows, and the kids can walk straight out to the yard to go sledding. That lower level is a walkout basement. On the right lot, it can be some of the most useful square footage in a Canadian home. On the wrong lot, or with a careless design, it brings water problems, frost heave and cold floors. This guide covers how to tell which case you are in and how to choose a plan that makes the most of the slope.
What a walkout basement is, and how it differs from the alternatives
A walkout basement has at least one wall mostly or fully above grade, with a door at ground level. The house is set into the slope. The uphill side looks like a bungalow or a two-storey from the street. The downhill side shows a full extra storey.
Walkout, lookout and walk-up
Canadian builders and real estate listings use three terms that people often mix up:
- Walkout: the lower floor opens at grade through a patio or garden door. This needs the most slope, usually close to a full storey of drop across the house.
- Lookout: the basement sits higher than usual, so larger windows fit above grade. There is no door to the outside. A gentle slope or a raised foundation can be enough.
- Walk-up: a standard basement with an exterior stairwell that climbs to the yard. It works on a flat lot, but the stairwell needs its own drain and snow management.
| Type | Slope needed | Natural light | Exterior access | Relative cost |
|---|---|---|---|---|
| Standard full basement | None | Small windows, window wells | None | Baseline |
| Lookout basement | Gentle, or raised foundation | Larger windows above grade | None | Slightly higher |
| Walk-up basement | None | Small windows | Exterior stairwell | Moderately higher |
| Walkout basement | About 6 to 9 ft drop across the footprint | Full windows and patio doors | Door at grade | Higher; depends heavily on the site |
If your lot has the drop, browse house plans designed for sloped lots. Most of them already assume a lower level that opens to the rear or side.
Reading the slope: grading and drainage
Before you fall in love with a plan, get a topographic survey of the lot. An Ontario Land Surveyor, a BC Land Surveyor or the equivalent in your province can do it. The survey shows how much the ground drops, in which direction, and where water goes in the spring melt. That information decides more about the design than any floor plan does.
Where the slope runs
The easiest case is a lot that falls from the street toward the back. The house reads as a bungalow from the front and opens to the backyard below. A lot that slopes sideways suits a side walkout, often paired with the garage on the high side. A lot that rises from the street is the hardest. It usually needs a front-facing lower level or a lot of retaining wall.
Managing water
A walkout puts the house across the path water already takes downhill. The design has to send that water around the house, not into it:
- Swales on the uphill side catch surface runoff and route it around the foundation.
- Positive grading away from the walls on every side. Municipal lot-grading guidelines and the provincial code set the minimums, and many municipalities require an approved grading plan before they issue the permit.
- Weeping tile along the footings, drained to daylight on the low side where the site allows. Otherwise it goes to a sump pit.
- A drained, slightly sloped patio at the walkout door, with the slab set a step below the finished floor so meltwater does not pool against the threshold.
One benefit is easy to overlook. On a well-graded walkout lot, gravity often lets weeping tile drain to daylight. That can mean less reliance on a sump pump than in a fully buried basement.
Frost protection on a sloping foundation
Frost is where walkouts differ most from standard basements. In a conventional basement, every footing sits deep below grade. In a walkout, the downhill footings sit close to the surface, where frost can reach them.
Stepped footings and frost depth
Footings must bear below the local frost line. In much of southern Ontario, that is commonly about 4 ft (1.2 m). On the Prairies and further north it is deeper. Your municipality or engineer will confirm the figure for your site. On a slope, the foundation usually steps down along the side walls. The exposed low-side footings are either placed at full frost depth or protected with rigid insulation in a frost-protected shallow foundation design. That approach needs engineering and is not accepted everywhere, so check before you rely on it.
Insulating the exposed wall
The above-grade part of a walkout is often a short concrete knee wall topped by a wood-frame wall. It has to be insulated to above-grade wall standards, not basement standards. Pay attention to the joint between concrete and framing, and to the slab edge at the walkout door. Both are classic cold spots and condensation points. Under the BC Energy Step Code, or in any energy-modelled build, the extra glazing and exposed wall show up directly in the results. Plan for good windows and careful air sealing.
The deck above the walkout
Most walkouts sit under a main-floor deck. Snow and dripping water from that deck land right at your lower-level door. A deck with a drained, waterproofed surface turns the space below into a dry covered patio. That patio is usable in March and November, when an open deck is not. Also consider that snow loads on a waterproof deck are a structural question, and size the beams accordingly.
Windows, doors and the lower-level layout
The point of a walkout is light, so put the main rooms of the lower floor along the exposed wall. Use the buried uphill side for storage, the mechanical room (furnace or heat pump air handler, HRV, water heater), a home gym or a media room that does not need daylight.
Placing windows and doors
- Use a patio or garden door in the family room, ideally under the deck cover.
- Give every bedroom on the exposed wall a window that meets egress requirements. A window at grade is far easier and brighter than one in a window well.
- Keep at least one window on the side walls where the foundation steps up. It brightens the deep end of the floor plan.
- Mount window sills well above finished grade and keep them clear of snowdrifts on the low side.
What to put downstairs
A walkout makes the lower level feel like a real floor. That changes what you can put there: guest bedrooms, a rec room with a wet bar, or a secondary suite with its own entrance. Many Canadian municipalities now allow basement suites, but zoning, separate-entrance and fire-separation rules vary, so confirm with your city before you plan rental income.
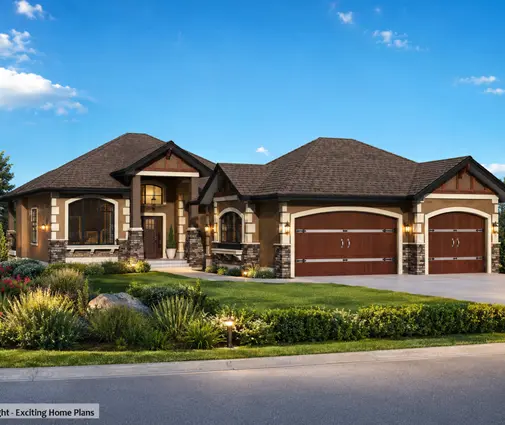
Several plans show how a compact main floor works over a lower level. The modern mountain plan with 4 bedrooms in 1588 sq ft keeps the main floor simple and pushes glass toward the view. The mid-century modern design with 5 bedrooms in 1492 sq ft shows how much living space a small one-storey footprint can deliver when the basement is bright enough for bedrooms. For a cottage or lake lot, the lake-style Craftsman with 5 bedrooms and 1677 sq ft is a good starting point.


Facing the view and the sun
On a sloping lot, the view nearly always lies downhill, and that is where the walkout faces. The question is whether downhill also catches the sun.
When the slope faces south
This is the ideal case. South-facing glass brings low winter sun deep into both floors and gives free heat in the coldest months. Roof overhangs or the deck above can shade it in summer. In a high-performance house heated by a heat pump, that winter sun noticeably lowers the load.
When the view and the sun disagree
Many lake and valley lots face north or east. You do not have to give up the view. Choose a plan with the main living spaces stretched along the view side. Add clerestory or side windows to pull in southern light, and use high-performance glazing on the north wall to limit heat loss. An east-facing walkout gets pleasant morning light. A west-facing one needs shading against summer evening heat.
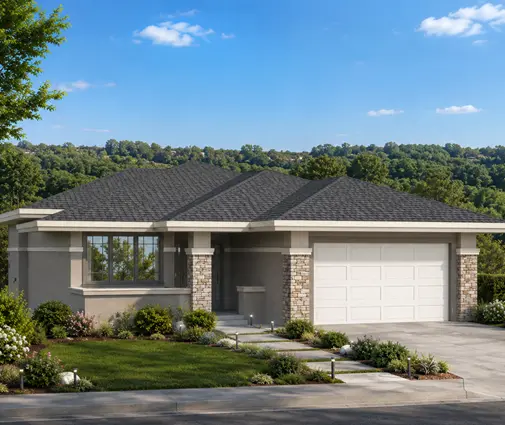
Wide, shallow layouts work best here because every main room touches the view wall. The 3-bedroom mountain ranch of 1745 sq ft and the modern ranch with 3 bedrooms and 2.5 baths in 1577 sq ft both follow that logic. For a bigger family on an acreage, the two-storey Craftsman with 3 bedrooms and 2240 sq ft stacks three levels of living over the slope. At the top end, the 4-bedroom lake and mountain home of 5457 sq ft shows what a long, glassy rear elevation can do. More ideas are in the large windows collection.


What a walkout costs compared with a standard basement
No honest article can give one number, because the slope, the soil and the access to the site drive the price. The extra cost usually comes from these items:
- Engineered stepped footings and frost protection on the low side
- Retaining or wing walls where the grade meets the house
- Wood framing, sheathing, cladding and above-grade insulation on the exposed wall
- Windows and a patio door, which cost much more than basement windows
- Grading, swales and a patio slab
- A larger or waterproofed deck structure above
As a rough guide, builders in 2025 often quoted a walkout as adding somewhere in the low to mid five figures in CAD over a comparable full basement on a straightforward lot. Rock, poor soil or heavy retaining walls can push the cost well past that. Some items cost less, though. You need fewer window wells and less backfill, and you may skip the egress window wells altogether. Finishing costs are similar to any basement. A finished walkout floor usually adds more resale value than a buried one, because it shows as bright living space. Get quotes from local builders based on your survey before you commit.
Pros
- Bright, livable lower floor with real windows and its own door
- Easier egress for basement bedrooms
- Potential for a secondary suite or in-law space
- Often better drainage options thanks to gravity
- Uses the slope instead of fighting it
Cons
- Higher foundation and envelope cost
- More engineering for frost protection and retaining walls
- More exterior wall and glass to insulate and air seal
- Careful grading needed to keep spring runoff away from the house
To compare options, start with the full range of house plans with a basement and narrow down to designs whose rear elevation has generous glazing.
FAQ
How much slope do I need for a walkout basement?
Typically the ground needs to drop about 6 to 9 ft across the depth of the house, roughly one storey. With less drop, a lookout basement or some regrading may be the better choice. Your survey and designer will tell you.
Can I put bedrooms in a walkout basement?
Yes, and it is one of the main benefits. Bedrooms on the exposed wall can get full-size windows that meet egress rules without window wells. Confirm the requirements of your provincial code with your municipality.
Is a walkout basement colder than a regular basement?
It can be if it is poorly built, because more wall and glass are exposed to winter air. With above-grade insulation, a well-detailed slab edge, quality windows and balanced ventilation through an HRV, a walkout can be as comfortable as any main floor.
Can any house plan be adapted for a walkout?
Many plans with a full basement can be, but the foundation, stairs and rear elevation must be reworked for your site. It is easier to start from a plan already drawn for a sloped lot. Then have a local designer or engineer adapt the foundation to your frost depth and soil.



