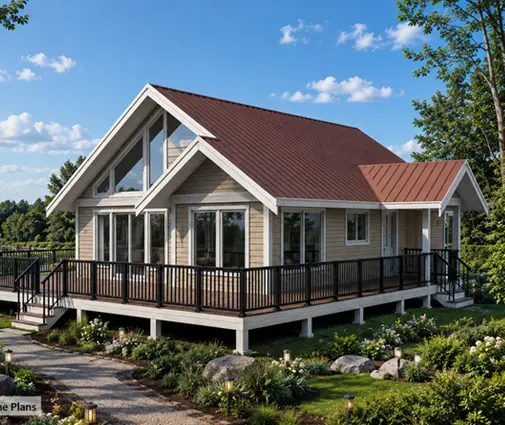
A common mistake goes like this. A family falls in love with a wide-open kitchen and great room, signs off on the plan, and only finds out at the framing stage that the wall they erased was holding up half the second floor. Now there is a beam to size, a post nobody wanted in the middle of the basement, and a change order on the table. None of this is a reason to avoid an open layout. It is a reason to plan the structure at the same time as the floor plan, not after it.
In a Canadian wood-frame house, loads travel from the roof, through the floors and walls, down to the foundation and footings. Remove a wall and that load has to be picked up by a beam, carried to posts, and taken down through the basement to the ground. The steps below follow that path in the order you will actually deal with it.
Step 1: Decide how open you really want it
Start with the plan, not the lumber. Mark which walls you want gone between the kitchen, dining and living areas, and which ones you can live with as a half wall, an island or a wide cased opening. A fully open main floor of 30 to 40 feet is a very different structural job from an opening of 12 or 14 feet.
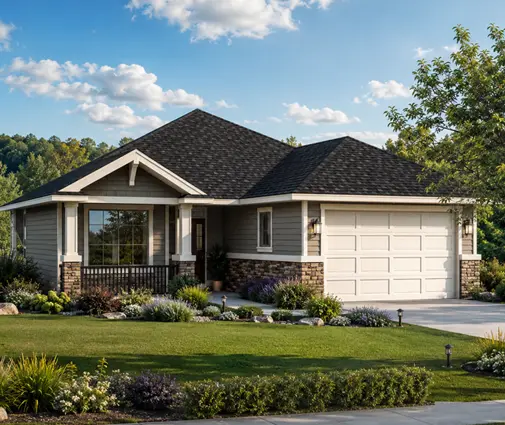
Browse open-concept house plans to see how designers already solve this. A bungalow such as this three-bedroom Craftsman of 1638 sq ft shows how much openness a single storey can deliver, because nothing heavy sits above the main floor except the roof.
Time: one to two weeks of thinking and sketching. Cost: nothing yet.


Step 2: Find out which walls carry load
In most bungalows the roof is framed with engineered trusses that span from exterior wall to exterior wall. Interior walls under trusses often carry little or no roof load, which is why one-storey homes open up easily. Rafter roofs, vaulted ceilings and hip roofs with girder trusses change that picture.
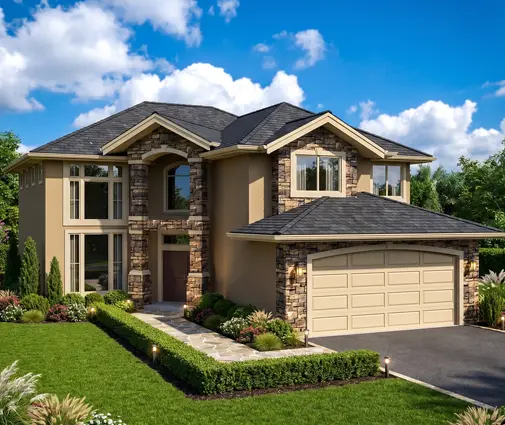
In a two-storey home the main-floor walls usually hold up the floor above, and sometimes walls stacked above them that carry the roof. A plan like this four-bedroom, two-storey home of 2189 sq ft needs the open kitchen and family room to be bridged by beams placed exactly where the upstairs bedrooms and bathrooms sit.
Snow load matters too. Roof loads in Canada vary widely by location, and a beam supporting roof load in a heavy-snow region can be much larger than the same beam in a milder area. Your designer works from the climatic data for your municipality.
Time: part of the design phase, a few days. Cost: included in plan modification or design fees.
Step 3: Choose the beam material
Three materials do most of the work in Canadian open-concept homes:
- LVL (laminated veneer lumber): the default for most residential beams. Sold in plies that are nailed or bolted together, it is consistent, light enough to carry by hand in shorter lengths, and easy for framers to work with.
- Glulam: glued-laminated timber, often chosen when the beam will be exposed, as in a vaulted great room or a timber-look Craftsman or Mountain design. Architectural grades cost more but look finished.
- Steel: a wide-flange or similar section that carries the heaviest loads with the shallowest depth. Common in basements and for very long main-floor openings, but it needs a fabricator, lifting equipment and wood nailers to attach the framing.
As a rough guide for 2025, LVL beams commonly ran in the range of about $20 to $60 CAD per linear foot depending on depth and number of plies; architectural glulam and steel usually came in higher once delivery and installation are counted. Prices move with the lumber market and your region, so get a current quote from your supplier.
Time: decided during design; engineered lumber can take one to three weeks to deliver. Cost: from a few hundred dollars for a short opening to several thousand for long or exposed beams.
Step 4: Flush beam or dropped beam?
This choice shapes the ceiling you will look at every day.
- A dropped beam sits below the floor joists, which rest on top of it. It is simpler and cheaper to frame, but it leaves a bulkhead across the ceiling, typically several inches to a foot deep.
- A flush beam sits within the depth of the floor, with the joists hung from its sides on metal hangers. The ceiling stays flat, which is what most buyers picture when they say "open concept."
Flush beams often need to be deeper or stronger to stay within the floor depth, and every joist needs a hanger, so they add material and labour. They can also complicate ductwork and plumbing runs, since nothing can pass through the beam itself. In a two-storey plan such as this modern four-bedroom design of 2189 sq ft, it is worth deciding early where you accept a dropped beam (over a kitchen island, for instance) and where you insist on a flat ceiling.
Time: a design decision, made before the framing package is ordered. Cost: flush framing usually adds a modest premium per beam for hangers, labour and sometimes a larger section.
Step 5: Check the joist spans
Beams are only half the story; the floor joists between them decide how many beams you need. Sawn 2x10 or 2x12 lumber is limited to fairly short spans, roughly in the low to mid teens of feet for a typical living floor, depending on species, grade and spacing. Engineered I-joists, now standard in many Canadian subdivisions, reach further: deeper I-joists at 16 inches on centre commonly span somewhere in the high teens to low twenties of feet. Open-web floor trusses can go further still and leave room for ducts.
Canadian span tables and manufacturer tables also account for floor vibration, not just strength, so the allowed span is often shorter than the joist could carry before failing. A floor that technically holds the load but bounces under the kitchen island is not what you want. Always size from the manufacturer's current tables or the layout prepared by your supplier.
Time: the joist layout is usually produced by the engineered lumber supplier in one to two weeks. Cost: deeper joists or tighter spacing add a few hundred to a couple of thousand dollars on a typical house.

Step 6: Carry the load down to the basement
Every beam ends on a post, and every post needs something solid underneath it. Point loads from main-floor beams must line up with a beam, a bearing wall or a footing in the basement. This is where open-concept main floors meet the reality of the full basements Canadian frost depths make so common.
Under the main floor, a central basement beam typically runs the length of the house, supported by columns sitting on concrete pad footings. Built-up lumber or LVL beams need columns at closer spacing; a steel beam can span further between supports, which leaves the basement more open for a future rec room or finished basement. Adjustable steel columns, known almost everywhere in Canada as teleposts, are widely used to support these beams; check your provincial code and inspector for the exact column and footing requirements.
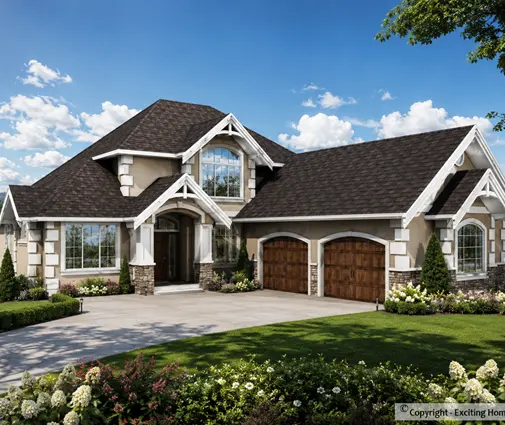
A larger home such as this 4907 sq ft, four-bedroom two-storey carries far more load down to its footings than a compact bungalow, and its basement layout has to be designed around those posts from day one.
Time: footings are poured with the foundation; the beam and posts go in at the start of framing, usually within a day or two. Cost: in 2025 a steel basement beam with installation often ran a few thousand dollars on a typical house; teleposts themselves are inexpensive, but each needs its own footing.
Step 7: Get the engineering and the permit
Most houses in Canada are designed under Part 9 of the National Building Code or the matching part of the Ontario, BC or Quebec code. Part 9 includes prescriptive tables for ordinary lumber. Once you rely on engineered products, long spans, heavy point loads or steel, the design generally needs to come from the manufacturer's sizing or an engineer.
Plans most likely to need a stamped design include:
- two-storey homes with large open areas under bedrooms;
- vaulted great rooms with a structural ridge beam, common in vaulted-ceiling plans;
- three-storey or sloped-lot homes, such as this four-bedroom, three-storey plan of 2285 sq ft;
- any steel beam, and beams carrying roof load in high-snow areas.
Engineered lumber suppliers often provide sealed beam and joist layouts with the framing package. Independent engineering for a house of this kind cost roughly $800 to $3,000 CAD in 2025, depending on complexity and region. Requirements differ between municipalities, so confirm with your building department or designer before you apply.
Time: one to three weeks for engineering, then the municipal permit review, which can range from a few weeks to a few months. Cost: engineering fee plus permit fees set by your municipality.
Step 8: Budget the framing premium
Pull it all together before you commit. On a typical 1,600 to 2,400 sq ft home, the structural premium for a truly open main floor, meaning beams, hangers, posts, extra footings, a steel basement beam and engineering, commonly lands somewhere between a few thousand and the low tens of thousands of dollars compared with a plan with conventional bearing walls. Flush beams, exposed glulam and long clear spans push you toward the top of that range.
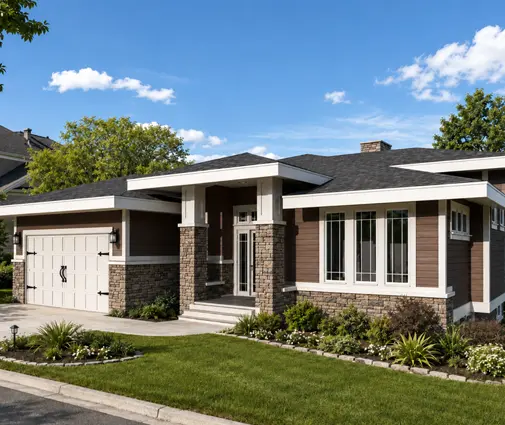
Bungalows usually sit at the low end. A plan like this four-bedroom Modern Craftsman bungalow of 1649 sq ft keeps its open living area under a truss roof, so the structural extras are mostly in the basement. Ask your builder to price the beams as a separate line in the framing quote so you can see exactly what openness costs.
Time: one week to collect quotes. Cost: nothing extra, but it can save you from change orders later.
Timeline at a glance
| Step | Typical duration | Typical cost (CAD, 2025) |
|---|---|---|
| 1. Decide on openness | 1–2 weeks | None |
| 2. Identify bearing walls | A few days | Part of design fees |
| 3. Choose beam material | During design; 1–3 weeks delivery | Hundreds to several thousand |
| 4. Flush or dropped beam | During design | Modest premium for flush |
| 5. Joist layout | 1–2 weeks | Hundreds to a couple of thousand |
| 6. Basement beam and posts | With foundation and framing | A few thousand |
| 7. Engineering and permit | 1–3 weeks plus municipal review | About $800–3,000 plus permit fees |
| 8. Framing budget | About 1 week | Premium of a few thousand to low tens of thousands |
Treat these figures as a starting point and confirm them with your designer, engineer and local builder. An open main floor is entirely achievable in a Canadian wood-frame home. The key is to plan where the load goes before the first wall comes down on paper.