The most expensive mistake on a heritage infill lot usually happens before anyone draws a line: the buyer closes on the lot, falls in love with a sleek flat-roofed design, pays for drawings, and only then learns the street sits inside a heritage conservation district. Months later they are redesigning the roof, the windows and the front porch, and paying for it twice.
Whether your lot is in an Ontario Part V district, one of Vancouver's character areas, a Quebec site patrimonial or an older Prairie neighbourhood with heritage guidelines, the process follows the same logic. There is a second approval on top of the building permit, and it judges how your house looks from the street. The steps below put that approval in the right place, so the house plan you choose is one you only have to buy once.
Step 1: Confirm exactly what protects your lot
Start with the municipality, not the real estate listing. Ask the planning or heritage department whether the property is in a designated heritage district, a character or heritage conservation area, a site under provincial protection, or simply a zone with design guidelines. Each carries different weight.
- Ontario: a district designated under Part V of the Ontario Heritage Act usually requires a heritage permit for new construction, guided by a district plan.
- British Columbia: Vancouver and other cities use character areas, heritage conservation areas and zoning incentives that shape what you can build next to older homes.
- Quebec: a site patrimonial can involve both provincial authorization and a municipal PIIA (plan d'implantation et d'intégration architecturale) review.
- Prairies: cities like Winnipeg, Calgary and Edmonton have heritage districts or guideline areas in some established neighbourhoods; the tools vary by city.
Also ask whether an existing house on the lot is listed or designated. Demolishing a contributing building can be a separate, longer fight than building new.
Time: 1 to 2 weeks. Cost: usually free; a zoning or property information request may cost a few hundred dollars depending on the city.
Step 2: Read the guidelines and walk the street
Get the district plan or design guidelines and read them with a pen. Most cover the same handful of things: height and number of storeys, roof form and pitch, setbacks that line up with the neighbours, front porches and entrances, cladding materials, window size and proportion, and where the garage may go.
Then walk the block. Photograph the five or six houses on each side. Note the typical eave height, whether roofs face the street as gables, how deep the porches are, and whether siding is wood clapboard, brick or stucco. Committees compare your elevations to the streetscape, so you should know it better than they do.
Time: 1 to 2 weeks. Cost: your own time.
Step 3: Book a pre-application meeting with the heritage planner
This is the single most useful hour in the whole process. Bring your street photos, the lot survey and two or three candidate house plans. Ask directly: what height is acceptable here, which roof forms have been approved recently, is a front-facing garage allowed, and do they need a heritage impact assessment or a streetscape study?
Many cities offer this meeting free or for a modest fee. Write down what you hear and confirm it by email; staff opinions are not binding, but they shape your design and the eventual staff report.
Time: 2 to 6 weeks to get a slot. Cost: often free to a few hundred dollars.
Step 4: Choose a house plan that already fits the street
The fastest approvals start from a design that is close to the neighbourhood on day one. In most older Canadian districts that means a two-storey home with a gable roof facing the street, a covered front porch, vertical windows and a modest footprint on a narrow lot. Browsing house plans with a front porch and gable roof designs narrows the field quickly.
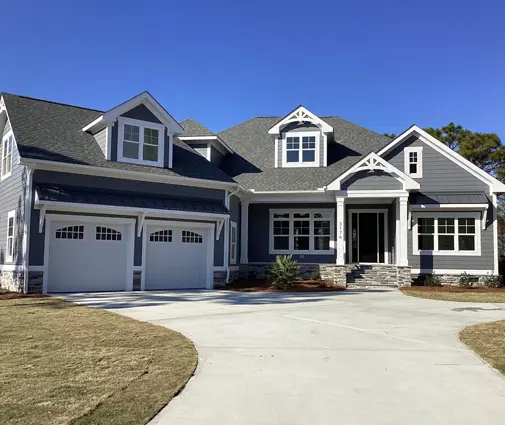
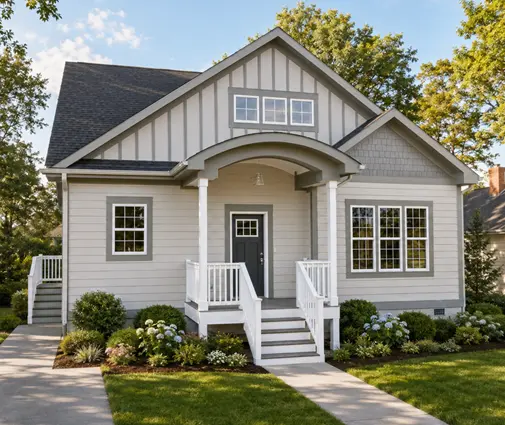
A good example is this 1744 sq ft cottage-style two-storey with 3 bedrooms and no attached garage: the porch, the roofline and the lack of a garage door on the façade all suit a street of pre-war homes. If you need a basement, which you will in most of Canada for frost depth and storage, a 2240 sq ft Craftsman two-storey with 3 bedrooms and a basement keeps the tapered-column porch and deep eaves that committees in Toronto, Ottawa or Edmonton tend to recognize.

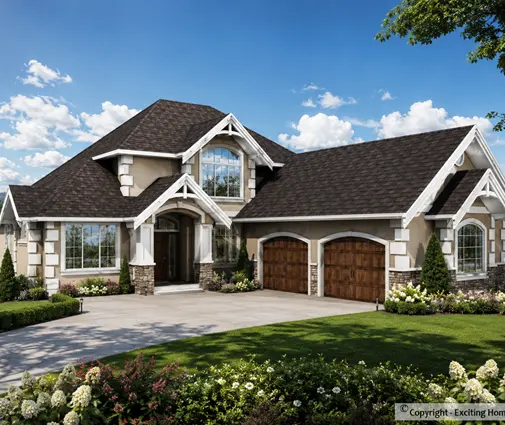
For a more formal brick street, a 4-bedroom traditional two-storey of 2189 sq ft with a basement reads well beside Edwardian and Georgian revival houses. On very tight lots, the narrow lot collection is where to look first.
Time: 2 to 4 weeks. Cost: the price of the plan set, which you only want to pay once.
Step 5: Adapt the plan for the district and the Canadian code
Almost every plan needs some adjustment, by a local designer or architect licensed in your province. The heritage changes are usually visible ones:
- Height: lowering wall plates or roof pitch to match neighbouring eave and ridge lines.
- Roof: swapping a hip for a street-facing gable, or adding dormers instead of raising the walls.
- Porch: making it deep enough to use, with columns and railings in the local style.
- Cladding: wood or fibre-cement lap siding, brick or stucco to match the block; vinyl is often refused.
- Windows: taller-than-wide openings, real or simulated divided lites, and trim widths that match.
- Garage: moved to the rear or a lane, or detached behind the house.
At the same time the drawings must meet your provincial code: snow loads, insulation levels, an HRV, and in B.C. the Energy Step Code tier your municipality requires. Thicker walls for higher R-values can push the house past setbacks, so check the footprint again after the energy changes. A plan like this 2589 sq ft Craftsman farmhouse with 4 bedrooms may need its front width trimmed for a typical 33 to 50 ft lot.
Time: 4 to 8 weeks. Cost: in 2025 to 2026, local adaptation and permit drawings commonly run from about $5,000 to $20,000 depending on how much changes; get quotes.
Step 6: Prepare the heritage documents
Expect to submit more than a building permit package. Common items are front and side elevations with materials labelled, a streetscape drawing showing your house between its neighbours, a site plan, colour and material samples, and sometimes a heritage impact assessment written by a qualified heritage professional.
A streetscape elevation is often what wins the committee over. If your proposed ridge sits a few feet above the neighbours, it will show, and it is better you see it first.
Time: 3 to 6 weeks. Cost: a heritage impact assessment, where required, roughly $3,000 to $15,000 in 2025 to 2026; streetscape drawings are often included in the designer's fee.
Step 7: Submit for heritage permit or design review
Once the application is deemed complete, it typically goes to heritage staff, then in many cities to a heritage advisory committee or design panel, and sometimes to council. In Ontario, the Heritage Act sets a decision period for Part V permits once the application is complete, often cited as 90 days; confirm the current rule and your municipality's meeting calendar, because one missed agenda can cost a month.

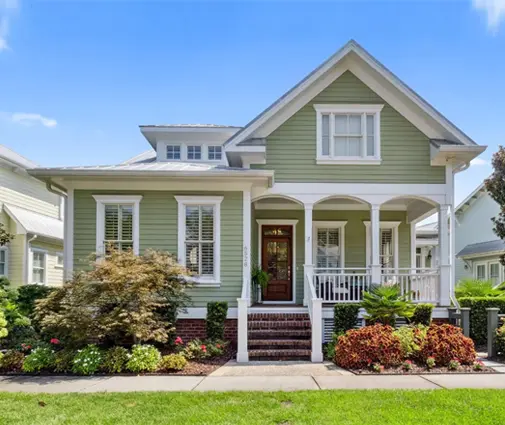

Be ready for conditions or a request to revise. Typical asks: lower the roof, enlarge the porch, change the window pattern, use real wood trim. Answer them quickly and clearly. A small two-storey such as this 1695 sq ft cottage-bungalow style home with 4 bedrooms and a full porch often sails through precisely because there is little to revise.
Time: 2 to 6 months in most cases, longer if council or an appeal is involved. Cost: heritage permit fees range from nil to several hundred dollars; revisions cost designer time.
Step 8: Clear zoning variances and the building permit
If the approved design needs relief from zoning, such as a reduced side yard to match the old houses next door, apply for a minor variance (Committee of Adjustment in Ontario, Board of Variance in B.C., the equivalent board elsewhere). Coordinate this with the heritage file; some cities want heritage support in hand first.
Then apply for the building permit with drawings that match the approved heritage elevations exactly. Any change after approval, even swapping siding, can send you back to heritage staff. A larger family plan such as this 5-bedroom Craftsman with a basement, 2186 sq ft fits well here because its massing is easy to keep consistent between the two approvals.
Time: 4 to 12 weeks for the building permit; add 2 to 4 months if a variance is needed. Cost: building permit fees vary widely by city and size, often a few thousand dollars for a single-family home; variance applications are frequently $1,000 to $5,000 in 2025 to 2026.
Step 9: Build to the approval, with sign-offs along the way
Heritage conditions follow you onto the site. You may need to submit window shop drawings, brick or siding samples, and porch details before installation, and staff may inspect the finished exterior. Put these items in your contract so the builder orders them on time; custom wood windows can take 8 to 16 weeks to arrive.
Time: construction of a two-storey wood frame home on a basement typically takes 8 to 14 months. Cost: heritage-appropriate cladding, trim and windows can add a noticeable premium over standard finishes; price them early.
Timeline at a glance
| Step | Typical duration | Typical cost (CAD, 2025 to 2026) |
|---|---|---|
| 1. Confirm protections | 1 to 2 weeks | Free to a few hundred dollars |
| 2. Guidelines and street study | 1 to 2 weeks | Your time |
| 3. Pre-application meeting | 2 to 6 weeks | Free to a few hundred dollars |
| 4. Choose a house plan | 2 to 4 weeks | Plan set price |
| 5. Adapt the plan | 4 to 8 weeks | About $5,000 to $20,000 |
| 6. Heritage documents | 3 to 6 weeks | About $3,000 to $15,000 if an assessment is required |
| 7. Heritage permit or design review | 2 to 6 months | Nil to several hundred dollars |
| 8. Variances and building permit | 1 to 6 months | A few thousand dollars and up |
| 9. Construction | 8 to 14 months | Depends on the house and finishes |
Put together, a heritage infill project usually adds three to nine months before construction compared with an ordinary suburban lot. The way to stay at the short end is simple: start from a two-storey with a porch and a gable roof that already looks like it belongs, and talk to the heritage planner before you buy the drawings. Rules and fees change, so confirm current requirements with your municipality and a local architect or designer before you commit.