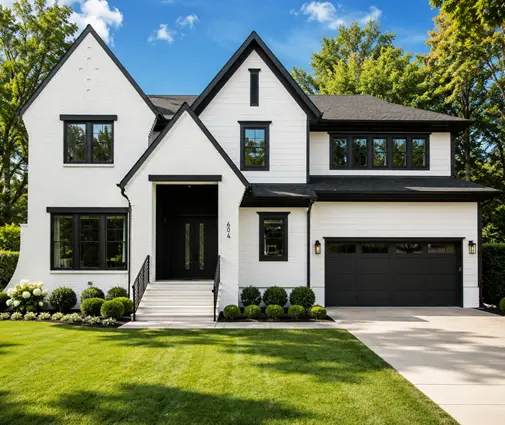
The drywall crew is booked for Monday. On Friday afternoon the building inspector walks through, finds poly torn behind the tub and no sealant on the bottom plates, and leaves a correction notice. Now the drywallers move to another job and you lose a week, sometimes two. Most delays on a new house in Canada are not caused by the inspector but by calling for an inspection before the work is really ready.
Your building permit comes with a list of required inspections, and you or your builder must book each one before the work is covered up. In Ontario these are prescribed notices under the Building Code: the owner or builder gives notice at each stage, and the inspector generally has to attend within a short set period, usually two business days. Other provinces work in a similar way, but the number of stages, the booking method and the timing differ by municipality, so read the inspection card attached to your permit before the excavator shows up. The checklist below follows the usual order for a wood-frame house with a full basement.
Stage 1: Footings, foundation and drainage
- Bearing soil: footings sit on undisturbed soil or engineered fill, below the local frost depth, with no water or mud in the trenches.
- Footing size and reinforcement: width and thickness match the approved drawings, and rebar or keys are in place where specified.
- Location: forms respect the setbacks on the site plan; many municipalities ask for a surveyor's foundation location certificate before framing.
- Dampproofing or waterproofing: applied to the full height of the basement walls below grade, without gaps at form ties.
- Foundation drainage: weeping tile laid at the footing, covered with clean crushed stone, and connected to a sump, storm sewer or ditch as approved.
- Anchor bolts and sill gasket: correct spacing and embedment, ready for the sill plate.
- Soil gas rough-in: where required, the gas-permeable layer and capped pipe under the slab for future radon mitigation.
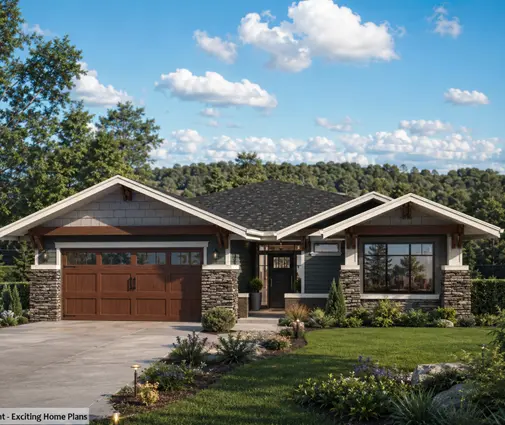
Two inspections are common here: one before the concrete is poured into the footing forms, and one before backfill. The second one is the one people rush, because the excavator is already on site. Book it as soon as the drainage stone is placed, and keep the drainage connection exposed until the inspector has seen it. A house with a deep basement, like this one-storey Craftsman of 1813 sq ft with four bedrooms and a full basement, has a lot of wall area below grade, and a missed patch of dampproofing is much cheaper to fix before the soil goes back in. If a basement is part of your plan from the start, the house plans with a basement show how much living space it can add.
Stage 2: Framing and rough-ins
- Structure: joists, beams, headers and studs match the drawings; engineered beams and roof trusses have their stamped layouts on site.
- Load paths: point loads carried down to the foundation, with proper bearing and posts, not resting on a floor sheathing joint.
- Fire blocking: at floor and ceiling levels, around chimneys and in concealed spaces.
- Stairs and guards: rise, run, headroom and handrail locations follow the code.
- Windows: bedroom egress openings large enough, and correct heights for windows close to floors.
- Attached garage: a gas-tight separation between the garage and the house, and a self-closing door where required.
- Rough-ins: plumbing under test, ductwork and venting in place, electrical inspected separately by the provincial or utility authority where that applies.
The framing inspection is the most detailed one, and it is where taller and more complex houses take longer. A three-storey modern farmhouse of 2082 sq ft has more stairs, guards and floor openings to check than a bungalow, and a large two-storey lake house of 5457 sq ft with a three-car garage will often have engineered beams and long spans that need engineering letters on site. In British Columbia, many municipalities that require higher levels of the Energy Step Code also ask for a mid-construction airtightness test by an energy advisor, usually once the air barrier is complete and before insulation is covered. Schedule the advisor early, since their calendar can be the bottleneck.
Stage 3: Insulation and vapour barrier
- R-values: wall, attic, rim joist and basement insulation meet the values of the energy compliance path chosen on your permit.
- Vapour barrier: polyethylene lapped over framing members, sealed with acoustical sealant, with no tears or open seams.
- Air sealing: around electrical boxes, plumbing stacks, ducts, windows and the attic hatch.
- Attic ventilation: baffles at the eaves so insulation does not block air flow from the soffits.
- Garage ceiling and walls: insulated and sealed where living space sits above or beside the garage.
This is the stage where most re-inspections happen, because small defects are everywhere: an unsealed pot light, a bathroom fan duct crushing the poly, a gap at the rim joist. Walk the house yourself with a flashlight the day before the visit. Pay close attention to rooms over the garage and to vaulted ceilings, where insulation depth is hard to reach. Compact single-storey layouts such as this four-bedroom bungalow of 1515 sq ft are generally easier to air-seal, which helps if you are aiming for a good blower-door result at the end.


Stage 4: Final inspection and occupancy
- Life safety: smoke alarms and carbon monoxide alarms installed, interconnected and working.
- Ventilation: the HRV or ERV installed and balanced, bathroom and kitchen exhaust running, with the balancing report available if your municipality asks for it.
- Stairs, guards and handrails: complete everywhere, including the basement, decks and exterior steps.
- Grading: soil sloping away from the foundation, downspouts discharging away from the walls, window wells drained.
- Energy: final blower-door test and energy compliance documents where your province or municipality requires them.
- Paperwork: electrical and gas sign-offs, engineering letters and any outstanding survey documents.
In many places the final inspection is what allows you to move in, through an occupancy permit or an equivalent sign-off. Some municipalities allow occupancy before exterior work is finished, with landscaping or grading completed later, often against a deposit. Do not schedule movers until you know which items your municipality expects for occupancy. For a family-sized two-storey, like this three-bedroom Craftsman of 2240 sq ft, unfinished basement stairs or a missing deck guard are typical reasons for a refused final.
Building in the country brings an extra question. In some rural areas the municipality has no building department and contracts inspections to an accredited agency or a regional authority; in some unorganized areas there may be no local inspection at all, while provincial electrical, plumbing and septic rules still apply. On an acreage, also expect a separate approval for the well and the septic system. If you plan a bungalow on a large lot, the one-storey house plans are a good place to compare layouts, such as this ranch-style home of 1745 sq ft with three bedrooms.
How to book a re-inspection without stalling the trades
- Read the notice: fix every item listed, not just the ones you remember from the visit.
- Take photos: some municipalities accept photos or a letter for minor items instead of a new visit.
- Ask about partial approval: one area of the house can sometimes be cleared while another waits.
- Budget for fees: in 2025 re-inspection fees in many municipalities were roughly CAD 100 to 300 per visit; check your local fee schedule.
Book the inspection only when the work is complete, and give your trades a realistic date that includes one possible correction cycle. One failed visit costs you a few days; three failed visits can push back drywall, cabinets and your move-in date.
The most common mistakes
- Backfilling or pouring before the inspection has been passed.
- Missing engineering letters or truss layouts on site at framing.
- Torn or unsealed vapour barrier around tubs, stairs and electrical boxes.
- Forgetting the BC mid-construction airtightness test until insulation is in.
- Moving in before the occupancy permit or final sign-off.
- Assuming a rural lot needs no inspections, then finding out the well, septic and electrical do.