The framing inspection passed on Tuesday. On Thursday the drywall crew arrived, and that was when you noticed the kitchen window sat a foot to the left of where the plan put it. Nothing about it breaks the building code, so the inspector had no reason to flag it. It just isn't the house you paid for, and moving it now means tearing open a finished wall.
This is the gap many Canadian owners discover too late. The municipal inspector visits your site to confirm that the work meets the National Building Code or your provincial code, such as the OBC in Ontario or the BC Building Code. The inspector is not there to compare the house with your drawings or with what you discussed with the builder. Your own site visits fill that gap. Below, the two kinds of visits are compared stage by stage, so you know what is already covered and what is up to you.
Municipal inspection vs your own site visit, at a glance
| Stage | What the municipal inspector looks at | What you check against your plan | Photos to take |
|---|---|---|---|
| Footings and foundation | Footing size and depth below frost, rebar where required, damp-proofing and drainage before backfill | House position on the lot, setbacks you agreed to, window well and door locations, height of the foundation above grade | Wide shots from each corner, weeping tile, any pipes through the wall |
| Framing | Structural members, spans, headers, bracing, stairs, fire separations, egress openings | Room sizes, window and door positions, ceiling heights, closet and stair layout | Every wall of every room, with a tape measure visible |
| Blocking | Usually nothing, it is not a code item in most rooms | Solid wood backing for grab bars, wall-mounted TVs, cabinets, shelving, railings | Each piece of blocking with a measurement from the floor |
| Plumbing, HVAC and electrical rough-in | Safety and code items, often with electrical inspected by a separate provincial authority | Outlet, switch, light and data locations, fixture positions, duct runs | Every wall cavity with wiring, pipes and ducts |
| Insulation and air sealing | Insulation and vapour barrier as required, depending on the municipality and province | Gaps, compressed batts, sealing around windows and penetrations, the R-values you were promised | Close-ups of tricky spots, labels on insulation bags |
The exact list of mandatory inspections varies from one municipality to another, so read your permit documents or ask the building department which stages they visit. Then plan your own visit just before each one, while there is still time to fix things.
Foundation and window wells
Verdict: the inspector checks the footing, you check where the house sits.
With frost depths across most of Canada pushing footings well below grade, a full basement is often the natural choice, and it is the first big pour you cannot easily undo. Before the forms are filled, walk the site with your site plan. Is the house turned the way you wanted for sun and view? Is the driveway side right? On an acreage, a few degrees of rotation can change what you see from the kitchen for the next thirty years.
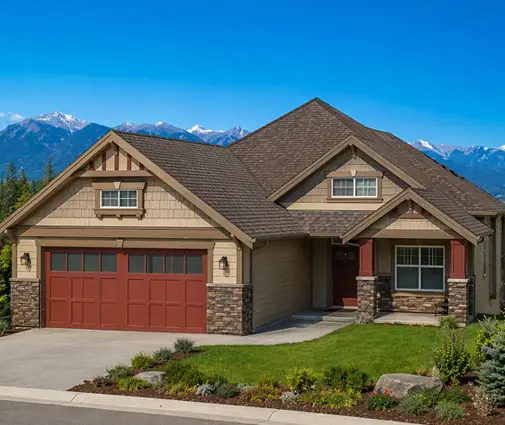
Then look at the openings. If you plan to finish the basement later, the window locations and their wells decide where bedrooms can go, since a basement bedroom needs an egress window that meets your provincial code. A bungalow like this four-bedroom single-storey plan over a full basement doubles its usable space once the lower level is finished, but only if the windows were placed with that in mind. Check the height of the foundation above the final grade too: too low, and window wells fill with snowmelt every spring.

Framing against the drawings
Verdict: the inspector checks that it stands, you check that it matches.
Framing is the moment the plan becomes rooms you can walk through, and the best moment to catch layout mistakes. Bring a printed copy of your drawings and a tape measure. Measure each room, each hallway and each door opening. Check that windows are where the elevations show them and at the sill height you chose, which matters for furniture and kitchen counters.
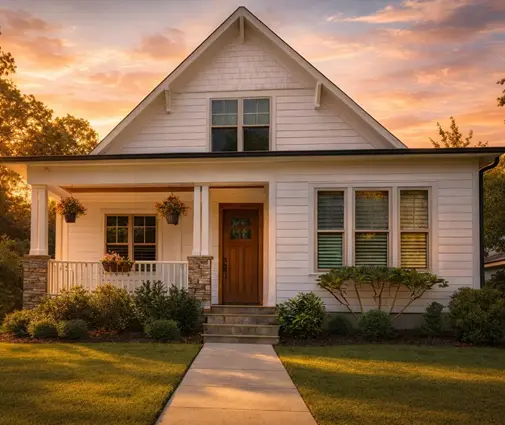
On a two-storey home such as this three-bedroom farmhouse with the bedrooms upstairs, look closely at the stair: headroom, the width of the landing, and whether the upstairs hallway matches the drawing. Closets are another frequent casualty, often shrunk by a few inches to make room for a duct chase nobody mentioned. If you browse two-storey plans while you are still choosing, note which ones have simple, stacked walls: they are easier to frame exactly as drawn.
Blocking for grab bars, TVs and cabinets
Verdict: almost no one checks this unless you do.
Blocking is the solid wood fastened between studs so that heavy items can be screwed in later. It costs very little during framing and a lot after drywall. Mark on your drawings every place you want it: beside and behind toilets and in showers for future grab bars, behind the TV wall, under floating vanities, for upper kitchen cabinets, for a stair handrail, for a heavy mirror or a shelf in the mudroom.
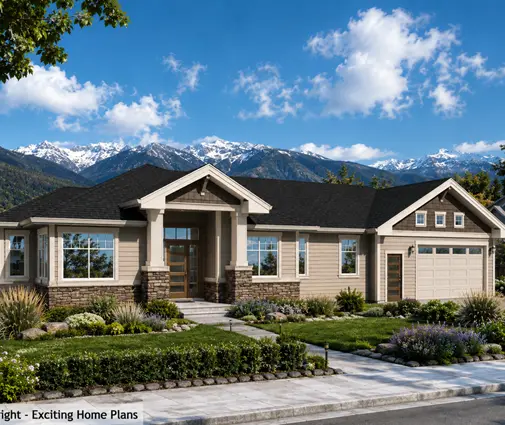
Grab bars deserve thought even if you are young. A plan like this one-storey home with three full bathrooms is a good candidate for aging in place, and backing installed now makes that future nearly free. On the day of your visit, photograph each piece with a tape measure showing its height from the subfloor, and note which side of which stud it sits on.
Outlets, switches and lights at rough-in
Verdict: code sets the minimum number, you decide where they make sense.
The electrical inspection confirms that the wiring is safe. It will not tell you that the switch is behind the door swing or that the outlet for the bedside lamp landed where the bed cannot go. Walk each room with your furniture layout in mind. Check the island outlets, the switches at both ends of halls and stairs, the exterior outlets for holiday lights and a block heater, a circuit for a future EV charger in the garage, and wiring for a heat pump if one is planned.
Larger homes multiply the details. In a five-bedroom bungalow with a basement below, that is five bedrooms of bed walls, desks and lamps to think through, plus the lower level. Pay attention to plumbing too: the position of the shower valve, the height of the vanity drain, the location of the kitchen sink relative to the window.
Insulation and air sealing before drywall
Verdict: the inspector may check, but you have the most to lose.
In a Canadian winter, the quality of the insulation and the air barrier shows up on every heating bill, and once the drywall goes up you will never see it again. Look for batts that fill the cavity without gaps or compression, insulation behind tubs and in the corners, foam or tape around windows and every pipe and wire going outside, and a continuous vapour barrier where your design calls for one. Check the bag labels against the R-values in your contract.
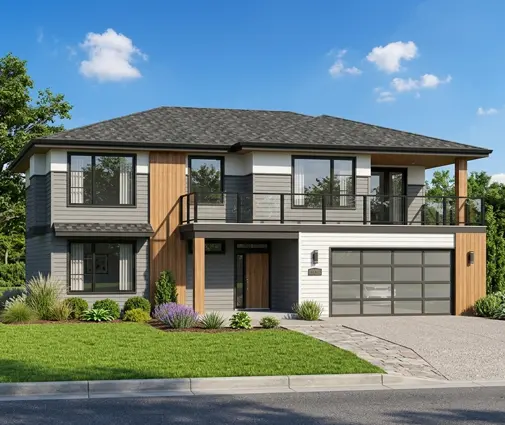
Homes with lots of glass need extra care. A design like this Prairie-style contemporary with five bedrooms has many window openings, and each one is a potential leak. If your municipality requires an airtightness test, as is common under the BC Energy Step Code, ask whether a mid-construction test is possible: finding leaks before drywall is far easier than after. Also confirm where the HRV ducts run and that they are sealed.

Raising problems with the builder
Verdict: polite, specific and in writing beats any argument on site.
Most builders want to fix mistakes early; it is cheaper for them too. Arrange your visits in advance, wear boots and a hard hat if the site requires it, and talk to the site supervisor rather than the trades directly. When you find something, describe it calmly on site, then send a short email the same day: what you saw, where, a photo, the drawing reference, and the question "can you confirm how this will be addressed before the next stage?" Keep it factual and avoid blame.
Keep all of these messages in one folder with the builder's replies. If a disagreement grows, or if you later need to file a claim under your provincial new home warranty, where one applies, a dated written record is worth much more than a memory of a conversation. Check the warranty's reporting deadlines when you take possession, since some coverage depends on reporting defects in writing within set periods.
Photos for future renovations and warranty claims
Verdict: a few hundred photos now save hours of guesswork later.
Before drywall, walk the whole house and photograph every wall, ceiling and floor cavity, room by room, in the same order each time. Include a tape measure or a reference point such as a window edge so you can find studs, wires and pipes years from now. Photograph the foundation and drainage before backfill, the plumbing under the basement slab before it is poured, and the attic before it is insulated. Name the folders by room and date, and store a copy off your phone.
These photos help when you hang a heavy mirror, finish the basement, add a bathroom or prove a defect that existed from the start. They are especially useful on homes you plan to extend, such as plans from the basement collection where the lower level is often finished years after move-in.
Who should choose what
- Rely on municipal inspections alone only if you have no flexibility to visit and fully trust a builder who has built the same plan before. Even then, plan at least one visit before drywall.
- Do your own visits at every stage if you live nearby and built your plan around specific details: window positions, a finished basement later, accessibility, particular furniture layouts. This suits most owners of custom and semi-custom homes, including single-storey bungalows designed for aging in place.
- Hire an independent home inspector or a designer for the framing and pre-drywall stages if you build far from where you live, on a remote acreage or a cottage lot, or if you do not feel confident judging insulation and air sealing. Ask for fees in writing, since in 2026 they vary widely by region and scope.
- Combine your visits with a hired check on larger or more complex homes, like a three-level Craftsman with a basement, where more storeys mean more walls, more ducts and more chances for a detail to slip.
Whatever you choose, the rule is the same: look before each layer goes on, write down what you see, and take the photo. Once a wall is closed, the plan you chose is only as good as what you checked.



