The cheapest chance to keep water out of your basement lasts about a week. It is the gap between the foundation walls curing and the excavator pushing the dirt back against them. Once that soil is in place, every drainage detail behind it is locked in for the life of the house, and fixing a mistake means digging up the yard, the deck and the driveway. In much of Canada, where full basements are standard because footings have to sit below the frost line, that week deserves more of your attention than the kitchen finishes.
This guide walks through the parts of a foundation drainage system in a new build, what each one does, roughly what it costs in 2026, and what to confirm with your builder before backfill. Costs vary a lot by region, soil and access, so treat the ranges as a starting point for your own quotes.
How water gets into a basement in the first place
A basement is a concrete box sitting in wet ground. Water reaches it in three ways: rain and snowmelt soaking down beside the walls, groundwater rising from below during spring thaw or after long rain, and capillary moisture wicking through the concrete itself. A good system deals with all three in layers, so that no single part has to be perfect.
The layered approach
- Surface: grading, downspouts and eavestroughs move most water away before it reaches the wall.
- Wall: a coating or membrane slows moisture through the concrete, and a drainage layer gives water an easy path down.
- Footing: perimeter weeping tile in clear stone collects that water and carries it away.
- Discharge: a sump pit or a gravity connection gets it off your lot, and a backwater valve keeps sewage from coming back in.
This matters even more if you plan to finish the lower level. A plan like this 1,568 sq ft Craftsman bungalow with six bedrooms only reaches that bedroom count because part of the sleeping space is downstairs, and drywall, carpet and a bedroom do not forgive a damp wall.
Weeping tile and clear stone: the system at the footing
Weeping tile is the perforated pipe laid around the outside of the footings, usually 4 inches (100 mm) in diameter. The name comes from the old clay tiles; today it is almost always flexible or rigid plastic pipe. Water from the surrounding soil enters through the holes and runs to the sump pit or to a storm connection.
Why the stone matters as much as the pipe
The pipe is bedded in and covered with clear crushed stone, typically 3/4 inch with no fines, so water can move freely to it. The National Building Code sets minimum cover over the pipe, and many builders go beyond it. Ask what depth of stone is planned and whether filter fabric wraps the stone or the pipe has a filter sock. In silty or fine sandy soil, fines can migrate into the stone and clog the system within years; a fabric wrap is cheap insurance.
Details that separate good from adequate
- The pipe sits beside the footing, not on top of it, with its top below the underside of the basement slab.
- It has a continuous slight slope to the outlet, with no low spots that hold water.
- Cleanouts or a clear connection at the sump let a plumber flush or camera the line later.
- A layer of clear stone or a drainage connection under the slab, so water rising from below also reaches the pit.
In 2026, perimeter weeping tile with clear stone on a new build typically runs about $15 to $40 per linear foot. For a bungalow footprint of around 1,600 sq ft, with a perimeter of roughly 170 to 200 feet, that often comes to $3,000 to $7,000.
Damp-proofing vs waterproofing the foundation walls
These two words are not interchangeable, and the difference is worth understanding before you sign.
Damp-proofing resists moisture moving through the concrete but is not designed to hold back water under pressure. It is usually a sprayed or rolled asphalt-based coating, and the building code requires at least this on below-grade walls in most situations. Waterproofing is a continuous membrane meant to resist water under hydrostatic pressure, and the code calls for it where groundwater can stand against the wall, for example on a high water table.
Dimple board vs spray-on membranes
Dimple board is a high-density plastic sheet with raised dimples that hold it off the wall. It creates an air gap so water that reaches the wall runs straight down to the weeping tile instead of soaking in, and it protects the coating from damage during backfill. It is common over damp-proofing in Ontario and the Prairies, and many builders treat it as standard.
Spray-on or roll-on elastomeric membranes form a seamless rubbery layer that bridges small cracks in the concrete. Better systems combine a membrane with a drainage board or dimple board over it. If you are building on clay that holds water or on a lot where the soils report flagged a high water table, this combination is the one to ask about.
| Wall treatment | What it does | Typical 2026 cost (CAD) |
|---|---|---|
| Spray or roll damp-proofing only | Slows moisture through concrete; code minimum in many cases | $1 to $3 per sq ft of wall, often $1,500 to $4,000 |
| Damp-proofing plus dimple board | Adds an air gap and a drainage path to the weeping tile | $2 to $5 per sq ft, often $3,000 to $7,000 |
| Elastomeric waterproofing membrane | Resists water under pressure; bridges hairline cracks | $5 to $12 per sq ft, often $8,000 to $20,000 |
| Membrane plus drainage board | Highest protection for wet sites and finished basements | Add roughly $2 to $4 per sq ft to the membrane |
ICF foundations need products compatible with the foam; solvent-based coatings can damage it. If your plan uses insulated concrete forms, confirm the membrane is rated for them.
Sump pits and backwater valves
Where the weeping tile cannot drain by gravity to a storm sewer or to daylight on a sloped lot, it ends in a sump pit: a lined well in the basement floor where a pump lifts the water out to the surface or to a storm connection.
Getting the sump right
- A sealed, gasketed lid keeps soil gas and humidity out of the basement, which matters in radon-prone areas.
- A pump sized for your site, with a check valve on the discharge line.
- A discharge that ends well away from the foundation, never right beside it, and does not freeze in winter.
- A battery backup or water-powered secondary pump, because storms and power outages tend to arrive together.
- A dedicated electrical outlet, ideally with a high-water alarm.
In a new build, a sump pit with a quality primary pump usually costs $1,000 to $3,000, with a backup system adding $500 to $1,500.
The backwater valve
A backwater valve sits on the main sanitary drain and closes if the municipal sewer surcharges, so sewage cannot flow back up through your floor drain. Many Canadian municipalities now require one in new homes, and some offer subsidies for adding them to existing houses. Installed during construction, a normal or mainline valve often costs $300 to $1,000; retrofitting one later by cutting the slab is commonly $1,500 to $3,500. Make sure it stays accessible under the finished floor, with a removable cover, because it needs occasional cleaning.

Lot grading and the sanitary sewer question
The cheapest water to manage is the water that never reaches the wall. Final grading should slope away from the house on all sides; many municipal lot grading standards ask for a drop of roughly 2 to 5 percent near the foundation, but the exact figure is set locally and often shown on an approved grading plan for subdivision lots. Downspouts should discharge several feet from the house onto splash pads or into a proper drainage path.
Backfill settles for a year or two. Plan to top up low spots near the walls after the first winters, and keep the finished grade at least several inches below siding and window sills. Window wells need their own drainage connection to the weeping tile or a stone base.
Why weeping tile cannot go to the sanitary sewer
Older Canadian houses often had weeping tile connected straight to the sanitary sewer. During heavy rain that clean water overloads the treatment plant and the pipes, which is a major cause of sewage backing up into basements across whole neighbourhoods. As a result, many municipalities now prohibit connecting foundation drains to the sanitary system in new construction and require either a storm connection or a sump pump. Some older cities also require downspouts to be disconnected. Rules differ by city and even by subdivision, so check with your municipality's building department before the plumbing design is finalized.
On acreages without a storm sewer, the weeping tile usually drains to daylight downhill or to a sump that pumps to a swale. A walkout design on a slope makes gravity drainage much easier; the sloped lot plans are worth browsing if your property falls away from the road.
| Site work | Typical 2026 cost (CAD) |
|---|---|
| Final grading on a suburban lot | $2,000 to $8,000 |
| Storm lateral connection, where available | Highly variable; ask the municipality and your builder |
| Downspout extensions and splash pads | $200 to $800 |
| Swale or drainage path on an acreage | $2,000 to $10,000 or more, depending on length |
Choosing a plan with drainage in mind
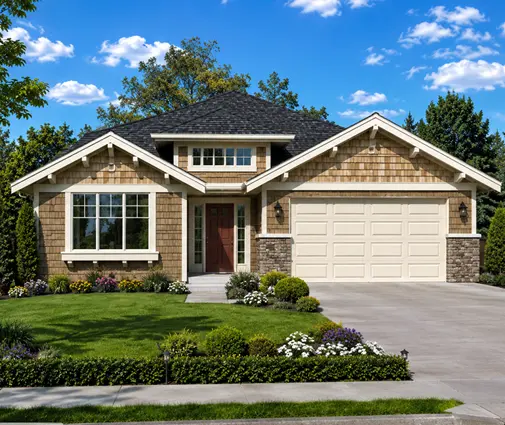
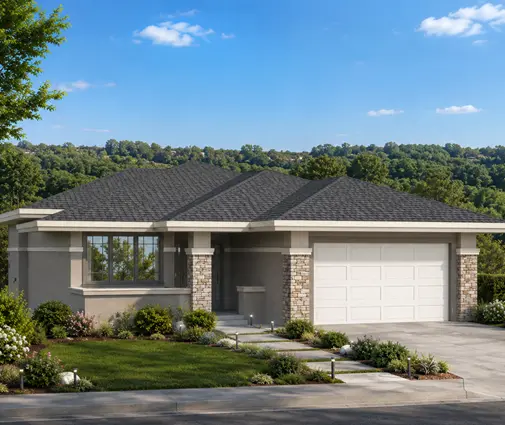
The house plan itself affects how hard the basement is to keep dry. A simple rectangle has fewer inside corners where membranes and weeping tile are harder to get right. A plan like this 1,577 sq ft modern ranch with three bedrooms or this 1,657 sq ft Modern Craftsman bungalow keeps the footprint compact and the perimeter short, which also keeps drainage costs down. Browse the one-storey plans for more compact bungalows.
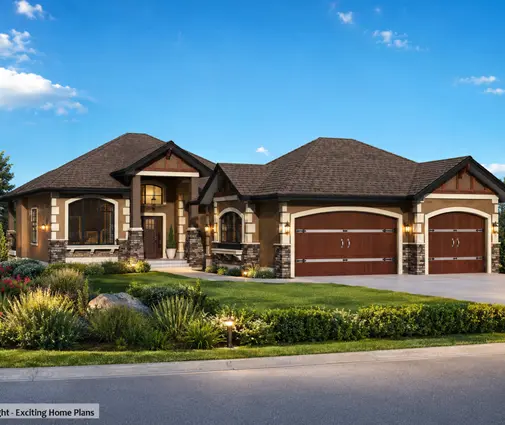
Larger footprints mean more wall to protect. The 2,299 sq ft five-bedroom bungalow with a three-car garage spreads out across the lot, so the membrane and weeping tile line items grow with it. On a narrower lot, going up rather than out, as in this three-storey, five-bedroom home of 2,370 sq ft, gives more living space over a smaller basement. If you want a contemporary look, the 1,492 sq ft Modern Mountain bungalow with five bedrooms also relies on a finished lower level. You can compare more options in the plans with a basement.


What to confirm with your builder before backfill
Bring this list to the site meeting after the foundation is poured, and ask for photos of each step if you cannot be there.
- What wall treatment is specified: damp-proofing only, dimple board, or a full membrane? Is it in the contract in writing?
- Is the weeping tile beside the footing, sloped to the outlet and wrapped or covered with filter fabric?
- How much clear stone goes over the pipe, and is it clean 3/4 inch stone?
- Where does the weeping tile discharge: sump, storm sewer or daylight? Has the municipality approved it?
- Are form tie holes and cold joints sealed before the coating goes on?
- Is the backwater valve on the plumbing drawings, and will it stay accessible?
- Will the backfill avoid large rocks and construction debris against the wall?
- Who is responsible for topping up settled grading after the first year, and is it covered by the new home warranty in your province?
FAQ
Is damp-proofing enough for a new basement?
On well-drained sandy soil with a low water table, damp-proofing with dimple board and good weeping tile often performs well. On clay or wet sites, or if you plan to finish the basement with bedrooms, a waterproofing membrane is usually worth the extra cost. Your builder's geotechnical information should guide the choice.
Do I need a sump pump if I have a storm sewer connection?
Not always. Some subdivisions allow weeping tile to drain by gravity to the storm sewer, though some require a sump to protect against storm surcharge. The municipal requirements for your lot decide this, so ask before construction starts.
How long does weeping tile last?
Modern plastic weeping tile in clean stone with filter fabric can last for decades. Failures usually come from clogging with silt or roots, which is why filter fabric and accessible cleanouts matter at the time of building.
Can I add waterproofing after the house is built?
Yes, but it means excavating around the foundation, usually at several times the cost of doing it during construction, plus restoring landscaping, walkways and decks. Interior systems are an alternative but manage water rather than stopping it at the wall.



