A common first-timer mistake goes like this. You buy a lot you love, then shop for a house plan, then call the bank. By the time the lender asks for a costed set of drawings and a builder's contract, the interest clock on the land is already running and the building season is half gone. Building a house in Canada goes much smoother when you do things in the right order and know roughly how long each step takes.
From buying the lot to getting the occupancy permit, most single-family projects take about 12 to 24 months. Planning and permits often take as long as construction itself. Here are the nine steps, in the order they usually happen, with the main differences between provinces.
1. Buy a lot you can actually build on
Before you make an offer, check the zoning bylaw. It tells you what you can build, the setbacks, the maximum lot coverage and the height limits. Then check the services. A suburban lot normally has municipal water, sewer and hydro at the property line. An acreage may need a drilled well, a septic system designed after a percolation or soil test, and a long hydro connection. Each of these can add tens of thousands of dollars. In Ontario, lots near watercourses or wetlands may also need approval from the conservation authority. Other provinces have their own environmental and riparian setbacks.
Make your offer conditional on a soil review and on confirming the services if you can. Poor bearing soil, a high water table or bedrock just below the surface will change your foundation design and your budget.
2. Set a budget and line up a construction mortgage
A regular mortgage pays the full amount at closing. A construction mortgage pays it in stages, called draws. The lender usually releases three to five draws, for example at foundation, at lock-up (roof, windows and doors in), at drywall and at completion. Before each draw, an appraiser or inspector confirms that the stage is done. In practice, you or your builder pay for each stage first and get the money afterwards, so you need cash or a line of credit to cover the gap.
Lenders typically want a fixed-price or detailed cost-plus contract, the permit drawings, a builder's licence or warranty enrolment, and often 20% equity or more. Land you already own usually counts toward that equity. Ask early how many draws the lender allows and whether they charge an inspection fee for each one. Building costs vary a lot by region and finish level. As a rough guide, in 2025 many custom homes cost somewhere between $300 and $500+ per square foot, before land, servicing and development charges. Get local quotes before you commit.
3. Choose a plan and adapt it for the Canadian climate
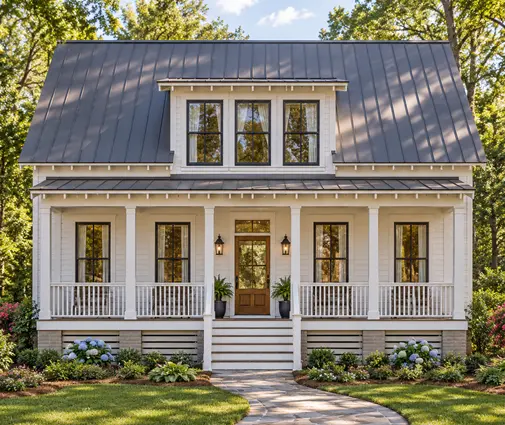
Pick a plan that fits your lot, your budget and how your family lives. Then expect to adapt it. A good starting point for a first build is a compact, simple shape with few corners and a straightforward roof, because these are cheaper to frame, insulate and keep warm. The Craftsman plan with 3 bedrooms and a basement at 1995 sq ft is a good example. It has a regular footprint, a two-car garage and a full basement, which suits most of Canada's frost depths.
If the plan you like was designed without a basement, a designer can add one. Below the frost line you are already digging 4 to 5 feet or more, so a full basement usually adds a lot of living space for a moderate extra cost. Wall assemblies will also need upgrading, for example to 2x6 exterior walls with higher R-values, and the roof will need trusses rated for your local snow load. You can browse house plans with a basement or start from the 1500–2000 sq ft range, where many first-time builders find the right balance between size and cost.


4. Get the drawings engineered and energy-compliant
Most houses fall under Part 9 of the National Building Code, or your provincial version of it. That means a qualified designer can usually prepare the permit drawings without a full engineering stamp. In Ontario, the designer generally needs a BCIN (Building Code Identification Number) unless you are the owner drawing your own home. Some elements still need engineering: roof trusses and engineered floor joists come with the supplier's layouts, and large openings, beams, steep slopes or retaining walls may need a structural engineer.
Energy rules are getting stricter everywhere. In BC, many municipalities require a specific level of the Energy Step Code, which involves energy modelling and blower-door testing. Ontario has its own energy efficiency requirements for houses, with prescriptive packages or a modelled path. Quebec has its own rules, administered with the RBQ. Expect an HRV or ERV in almost every new home, and plan space for it and for a heat pump early, not at the framing stage.
5. Apply for the building permit
You apply for the building permit at the municipality, or at the regional district or province in some rural areas. A typical package includes a site plan, the architectural drawings, truss and joist layouts, an energy compliance form and, on rural lots, the septic permit. Review times range from a few weeks in small towns to three months or more in busy cities. Incomplete applications are the most common reason for delays.
You will also have to budget for fees and charges. These can include permit fees, development charges or lot levies, water and sewer connection fees, and sometimes an entrance or culvert permit for a rural driveway. In fast-growing municipalities, development charges alone can be significant. Ask the municipality for the current schedule before you finalize your budget.
6. Hire your builder and enrol the warranty
New home warranties are provincial, and the rules affect who can build your house. In BC, a new home must normally be built by a licensed residential builder and enrolled in third-party home warranty insurance before a building permit is issued, unless you qualify for owner-builder authorization. Alberta has a similar mandatory warranty with owner-builder exemptions. Ontario's new home warranty program covers homes built by registered builders. Quebec has its own mandatory plan for many new homes. Coverage periods and owner-builder rules change, so check the current rules with your provincial regulator.
Get a written contract that spells out the price, what is included, allowances, the payment schedule matched to your lender's draws, and how changes will be priced. Most provinces also have a lien holdback, often 10%, which you keep back from each payment for a set period. It protects you if subcontractors or suppliers go unpaid.
7. From excavation to framing: the first inspections
Once the permit is posted on site, work moves quickly. A typical order is excavation, footings, foundation walls, damp-proofing and drainage, backfill, then framing. The building inspector usually visits at the footings (before the concrete is poured), at the foundation before backfill, and at framing once the house is closed in. Never cover work that has not been inspected. Opening it back up costs far more than the day you lose waiting for the inspector.
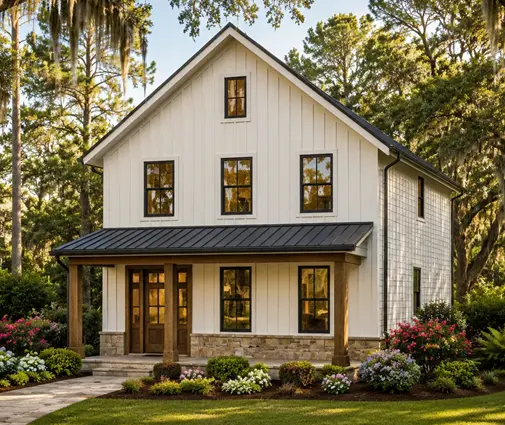
A simple house usually reaches lock-up two to four months after excavation, depending on weather and the trades available. A two-storey design like the 3-bedroom Craftsman with a basement at 2240 sq ft keeps the foundation and roof small for its living area. That makes it one of the more efficient shapes to build. For more options, see the two-storey plans.
8. Rough-ins, insulation and air sealing
The plumbing, electrical and HVAC rough-ins come next. Electrical work is usually inspected separately, by the provincial electrical safety authority or the municipality depending on the province. After the rough-in inspections come insulation and the vapour barrier, and many municipalities inspect these before drywall. If your home must meet a Step Code tier or a modelled energy target, the mid-construction blower-door test also happens at this stage. It is the cheapest moment to find and fix air leaks.
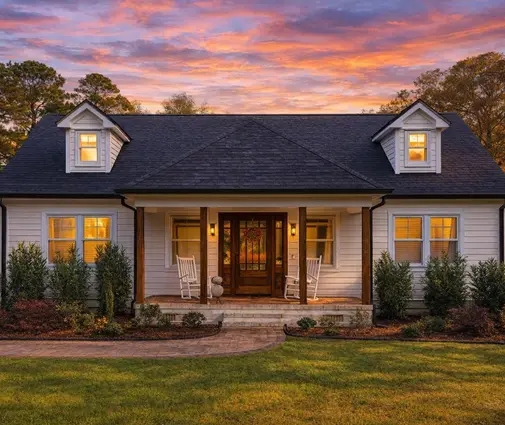
Smaller homes move through this stage faster and cost less to heat for decades. The 3-bedroom cottage-style plan at 1394 sq ft and the 3-bedroom farmhouse cottage at 1701 sq ft both suit a family that wants to keep the build simple. For a fourth bedroom without much more footprint, the 4-bedroom Craftsman at 1984 sq ft is worth a look.

9. Final inspection, occupancy and the warranty walkthrough
When the finishes, fixtures, guards, smoke and CO alarms and grading are done, you book the final inspection. Before anyone can live in the house, the municipality issues an occupancy permit or certificate, or marks the permit as finalized for occupancy. Some municipalities allow occupancy before the exterior work, landscaping or paving is complete, often with a deposit or a deadline. Your lender will usually release the last draw only after occupancy is granted, and many insurers want it too.
If your home is covered by a provincial warranty, do a pre-delivery inspection with the builder and list every deficiency in writing. Keep all permits, inspection records, energy reports and product warranties in one file. You will need them for warranty claims, for your insurer and, one day, for a buyer.
Plan the timeline backwards
If you want to break ground in spring, the design, engineering and permit application should be well under way the previous fall and winter. Choose your lot with the services in mind, set up financing before you commit to a plan, and pick a simple design that suits your lot and climate. Then let the inspections set the pace. Before every major decision, confirm the current rules with your municipality, your provincial warranty regulator and your designer, because codes and fees change from year to year.



