The trusses went up on a Friday in March, and then it rained for nine days straight. By the time the roof was sheathed and wrapped, there was standing water on the subfloor, the bottom plates were dark, and the drywall crew was booked for the following week. Variations of this scene play out every spring in the Lower Mainland and on Vancouver Island, and every fall when an early snowfall lands on an open frame in Saskatchewan or Alberta. The question is always the same: do you keep the schedule and close in, or do you stop and dry the house first?
Wood framing tolerates getting wet. What it does not tolerate is being sealed in while it is still wet. Here is how the two paths compare, criterion by criterion.
| Criterion | Close in right away | Dry to 19 per cent or less first |
|---|---|---|
| Moisture content at close-in | Often 20 to 30 per cent or more in plates, rim joists and subfloor | Measured at 19 per cent or below, ideally lower |
| Mould risk in the walls | Real, especially behind polyethylene and in cold corners | Low if the envelope stays dry afterwards |
| Drywall and trim | Nail pops, cracked tape joints, gaps at trim in the first heating season | Minor seasonal movement only |
| Floors | Swollen OSB edges, humps, squeaks as joists shrink | Flatter subfloor, fewer callbacks |
| Schedule | No delay now | Typically one to three weeks added, depending on weather and equipment |
| Direct cost | None now, repairs later | Equipment rental, power or fuel, sometimes subfloor sanding |
Moisture content at close-in
The National Building Code and the provincial codes based on it generally expect framing lumber to be at 19 per cent moisture content or less, and 19 per cent is the number most builders, inspectors and engineered wood manufacturers work with before insulation, vapour barrier and drywall go on. Kiln-dried lumber marked S-DRY or KD left the mill under that level; a few days of coastal rain can push surfaces well past it, and plates sitting in puddles can soak up much more.
Checking is straightforward. A pin-type moisture meter, which in 2025 costs anywhere from about 50 to 400 CAD, gives a reading when its two pins are pushed into the wood. Take readings in the places that dry last: bottom plates, sill plates on the foundation, rim joists, the subfloor near exterior walls, around window rough openings and in any spot where water pooled. Drive the pins below the surface, not just into the damp outer layer, and correct for species and temperature as the meter's instructions describe. Readings on frozen wood are unreliable, so on a Prairie site let the house warm up before you trust the numbers. Write the readings down with the date; a log of falling numbers is far more useful than one reading.
Verdict: dry first. If the meter says 22 per cent in the plates, the wall is not ready, whatever the calendar says.
Mould risk inside the walls
A Canadian wall is designed to keep moisture out and to dry slowly. Behind a polyethylene vapour barrier on the warm side and sheathing plus housewrap on the cold side, a wet stud has very little room to give up its water. Combine that with fibreglass or mineral wool batts and the first warm weeks of heating, and you have conditions where mould can start on OSB and at stud bays, often unseen until a smell or stain appears. Mould inside new walls can affect indoor air, and removing it means opening finished drywall.
Verdict: dry first. Closing in wet framing is the most common way new houses end up with hidden mould.
Drywall, trim and shrinkage cracks
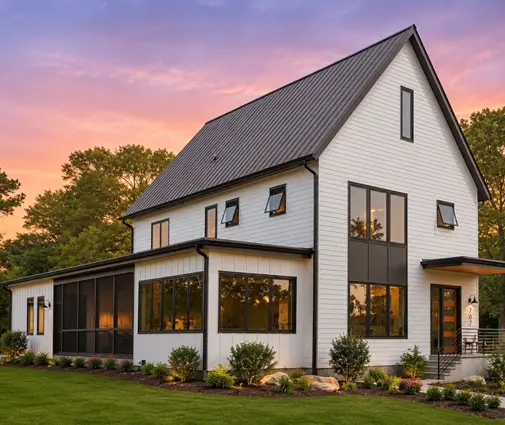
Wood shrinks as it dries, mostly across the grain. A wet 2x10 joist or a stack of wet plates loses height over the first heating season, and the drywall fastened to it does not. The result is familiar: nail and screw pops, cracked tape at the ceiling-to-wall corner, gaps opening under baseboards and stairs that start to creak. On a two-storey home with sawn lumber floor joists, the shrinkage of each floor adds up from the foundation to the roof. A plan like this 3,371 sq ft two-storey Modern Craftsman with three bedrooms has several floor assemblies stacked on each other, so dry framing at close-in matters more than on a single level.
Verdict: dry first. A few weeks of drying is cheaper than a season of drywall repairs and repainting.
Floors: subfloor, engineered joists and squeaks
OSB and plywood subfloors take the worst of the weather on an open frame. OSB edges can swell, and once swollen they rarely fully return, leaving ridges that show through vinyl plank or tile. Engineered I-joists are dimensionally stable in their flanges, but their OSB webs should not sit in water or snow for long, and the manufacturer's installation guide sets the rules for storage and exposure. Dimensional lumber joists that dry after the subfloor is glued and nailed tend to produce squeaks as fasteners loosen.
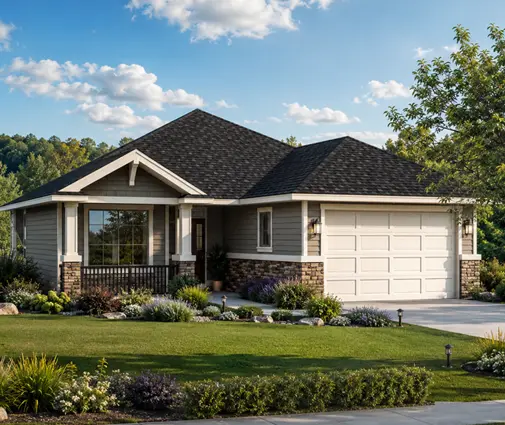
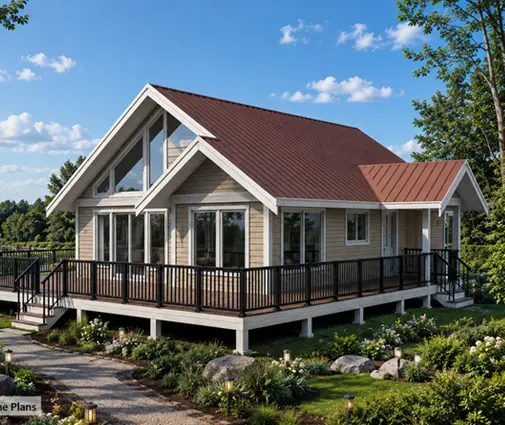
Large single-level homes are the most exposed here because so much floor area sits open before the roof is on. A bungalow such as this 1,707 sq ft one-storey farmhouse with three bedrooms has its whole main floor deck exposed at once. Homes with a full basement add another concern: this 1,745 sq ft Northwest-style ranch with a basement or this 1,675 sq ft three-bedroom mountain plan over a basement both need the basement drained and the sill plates checked, because water running off the deck collects on the slab and keeps the lower framing wet.


Verdict: dry first, and sand or plane swollen subfloor edges before finished flooring goes down.
Schedule and cost
This is the only criterion where closing in right away wins on paper. Drying usually adds one to three weeks, and trades may need to be rebooked. Equipment costs vary by region and supplier; as a rough idea in 2025, renting a commercial dehumidifier for a week often runs in the low to mid hundreds of CAD per unit, plus electricity, and a whole house may need two or three units. Compare that with repairing drywall throughout, re-flooring a room, or remediating mould behind finished walls, and the numbers usually favour patience.
Verdict: closing in saves time now; drying saves money over the first years of the house.
How the drying is done
The method depends on the climate. On the coast, outdoor air in spring is often already humid, so simply opening windows dries little. There, closing the house with the windows and doors in, adding moderate heat and running dehumidifiers is the practical route. On the Prairies in October and November, cold outside air holds very little water: bringing it in and heating it lowers its relative humidity sharply, so heat plus controlled air exchange works well.
- Heat: raise the temperature gradually rather than blasting the house. Very fast drying can cause checking, twisting and cupping in framing and stairs.
- Fuel choice: unvented propane or natural gas heaters release water vapour as they burn, which works against you. Indirect-fired heaters that vent exhaust outside, electric heaters, or the home's own heating once it is safe to run are better options.
- Dehumidifiers: drain them to a floor drain or sump, or empty them daily; a full tank stops the machine.
- Air movement: fans aimed at wet plates and floor areas speed things up, and some exhaust to the outside removes the moist air.
Keep insulation, poly and drywall off site or stored dry until the meter readings are where they should be.
Verdict: controlled, gradual drying beats both doing nothing and drying as fast as possible.
Protecting the framing on site
The best drying is the drying you avoid. Before framing starts, ask your builder these questions:
- How will lumber, sheathing and engineered joists be stored: off the ground, covered and with air flow?
- Will the subfloor be swept clear of snow and standing water every day, and will drain holes be drilled where water pools?
- How quickly after framing will the roof be sheathed and covered with underlayment, and windows installed?
- Who checks the moisture content before insulation, with what meter, and can I see the readings?
- What happens to the schedule if readings are above 19 per cent?
- How will the house be heated and dried, and with what equipment?
Write the answers into your contract or site notes. For more complex houses, such as this 3,214 sq ft Scandinavian-style home on three levels with large roof areas, or this five-bedroom 2,244 sq ft Craftsman with a basement, the time between framing and a dry roof is longer, so the plan for protection matters more. Your municipality's building inspector or your designer can confirm what your province expects at the framing and insulation inspections.


Verdict: protection on site is cheap; ask for it before the first stud goes up.
Who should choose what
- Close in right away only if the framing stayed largely dry, meter readings throughout are already at 19 per cent or less, and the subfloor shows no swelling.
- Dry first if you build on the BC coast in a wet spring: plan for dehumidifiers and moderate heat, not open windows.
- Dry first if you build on the Prairies in the fall: clear snow daily, warm the house gradually, use vented heat and let the wood thaw before measuring.
- Dry first if you are building a home with a full basement: drain the slab and check sill plates and rim joists closely.
- Be especially strict on two-storey homes with sawn lumber joists, where shrinkage adds up floor by floor, and on large one-storey bungalows, where a big subfloor sits exposed.
- In every case, ask for a written moisture log before insulation, and check current requirements with your municipality or an architect.