It is 7 a.m. in late January. The thermostat in the front hall reads 21°C, the furnace or heat pump is running, and your daughter is wrapped in a blanket in her bedroom over the garage because it is 17°C in there. Six months later the same room hits 27°C by bedtime while the main floor feels fine. In many new two-storey homes across Canada this is normal, and it is not the equipment's fault. It comes from decisions made, or skipped, before the first wall was framed.
The good news is that almost all of it can be prevented on paper. The steps below follow the order in which a build actually happens, so you know what to ask for and when. Costs are typical 2025–2026 ranges in CAD and vary by province, region and contractor. Confirm the code requirements with your municipality and your designer.
Step 1: Read the floor plan with air in mind
Before you commit to a plan, look at how the second floor relates to the main floor and the basement. Look for three things. First, is there a clear path for ducts to rise from the basement mechanical room to the upper floor through the middle of the house? Second, are there rooms over unheated space, such as a garage or a cantilever? Third, are there large west- or south-facing windows on the upper floor? Each of these affects how hard it will be to heat and cool the bedrooms evenly.
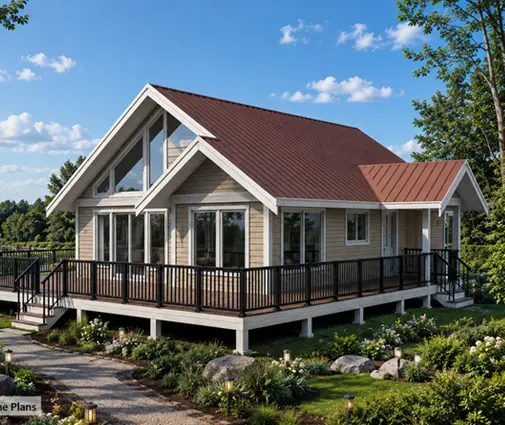
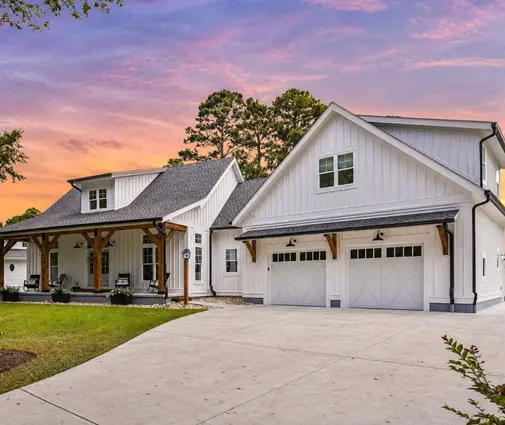
A compact home like this four-bedroom, two-storey plan of 1695 sq ft keeps the runs short and the upper floor stacked over the main one. A larger home such as this 3375 sq ft farmhouse with three bedrooms spreads the load over more wall and roof area, so the duct design needs more care. You can browse more layouts in the two-storey house plans collection.

Time: a few evenings while choosing the plan. Cost: nothing beyond your attention.
Step 2: Order a room-by-room heat loss and heat gain calculation
In Canada, residential heating and cooling is normally sized using CSA F280, a room-by-room method that calculates how much heat each room loses in winter and gains in summer. Many provinces, including Ontario, reference it through their building codes, and many municipalities ask for it with the permit drawings. A bedroom with two exterior walls and a big window can need two or three times as much airflow as an interior bedroom of the same size. Without this calculation, installers often split the air evenly by rule of thumb. That is where the cold room comes from.
Ask for the calculation to use your actual windows, insulation levels and air tightness target, not defaults. If you are in British Columbia and building to a higher Energy Step Code level, the energy advisor's model and the HVAC design should use the same assumptions.
Time: 1 to 3 weeks. Cost: roughly $500 to $1,500 on its own, often bundled with the duct design.
Step 3: Design the ducts room by room, not just the trunk
The heat loss numbers become a duct layout: trunk sizes, branch sizes, register locations and the expected static pressure of the system. Upstairs rooms are at the end of the longest runs, so they lose airflow first when ducts are undersized, crushed or full of elbows. A proper design gives each upstairs bedroom a branch sized for its peak load, ideally its own run rather than a tap off a shared branch.
Register placement matters too. Supplies near exterior walls and under windows help in winter. In rooms with high summer gain, a high-wall or ceiling supply tends to mix cool air better. Ask that every branch has an accessible balancing damper near the trunk, so the system can be tuned later.
Time: 1 to 2 weeks, done together with Step 2. Cost: a full design package of loads and layout typically runs $800 to $2,500.
Step 4: Give every bedroom a way for air to get back
This is the most common and cheapest mistake to avoid. Many homes have one or two central returns in the hallway. When a bedroom door is closed, the supply air pressurizes the room and has nowhere to go. Airflow into that room drops, and the bedroom drifts away from the thermostat setting all night.
There are three fixes, in order of effectiveness:
- A dedicated return duct from each bedroom back to the system.
- A jump duct through the ceiling or a transfer grille through the wall to the hallway, with sound baffling.
- Undercutting doors, which works for small rooms but is rarely enough on its own.
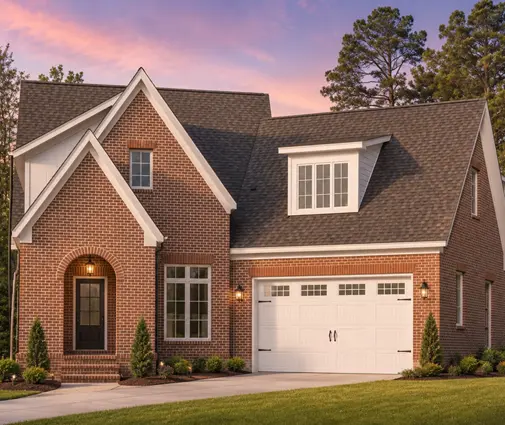
Your HRV does not solve this. It moves a small amount of fresh air and is not designed to carry heating or cooling loads. In a home like this four-bedroom Tudor-style two-storey of 3847 sq ft, four bedrooms with their own returns or transfer paths make a real difference to comfort at night.
Time: part of the duct design. Cost: about $150 to $400 per bedroom for a dedicated return or a jump duct during construction, many times more as a retrofit.
Step 5: Keep every duct chase inside the insulated envelope
A supply duct that runs through an exterior wall, an unheated attic or a garage ceiling loses heat in January and gains it in July before the air ever reaches the bedroom. Even when it is wrapped, it is also a weak spot for air leaks and condensation.
On the drawings, mark where the ducts will rise from the basement to the second floor. The best places are interior walls, a stacked closet chase or a framed bulkhead on the main floor. Ask the designer to size these chases before framing so the framer does not fill them with plumbing or blocking. If the second floor has a vaulted ceiling, there is often no attic space to hide ducts in anyway, which is good: it forces the runs inside. A full basement, standard on most Canadian lots because of frost depth, gives you an easy place to run trunks. The house plans with a basement collection is a useful place to compare mechanical room locations.
Time: a design meeting before framing. Cost: usually a few hundred dollars of extra framing, far less than fixing it after drywall.
Step 6: Treat a bonus room over the garage as its own problem
The room over the garage is the classic cold upstairs room. It has an unheated garage below, often three or more exterior surfaces, and the longest duct run in the house. To make it comfortable:
- Insulate and air-seal the floor over the garage to the same standard as an exterior wall, or better, with no gaps at the rim joist.
- Keep ducts above the floor insulation, never in the cold garage ceiling.
- Give it its own supply branch sized from the calculation and its own return.
- Consider a separate zone or a small ductless head if it is far from the main trunk.
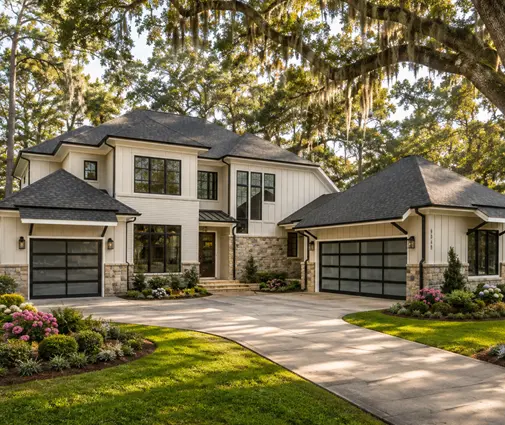
Plans with a large garage under living space, such as this 4176 sq ft Modern Craftsman with four bedrooms and a three-car garage, deserve this attention early. More examples are in the bonus room plans collection.


Time: included in Steps 3 to 5. Cost: extra floor insulation and air sealing often $1,000 to $3,000 depending on the area.
Step 7: Choose two-stage or variable-speed equipment
A single-stage furnace or heat pump runs at full output, shuts off, and repeats. Short cycles leave warm air stuck upstairs and cool air pooled in the basement. Two-stage and variable-speed equipment runs longer at lower output, which keeps air mixing between floors and evens out the temperature. A variable-speed blower also handles the higher static pressure of a long duct system better.
Many Canadian builds now use a cold-climate air-source heat pump, often with a gas furnace or electric backup. Variable-speed compressors suit these well. Check the current federal and provincial rebate programs before you choose, since eligibility and amounts change often.
Time: decide before the duct design is finalized. Cost: a variable-speed system typically adds $2,000 to $6,000 over a basic single-stage one.
Step 8: Decide between zoning and a second system
Zoning uses motorized dampers and separate thermostats to send air where it is needed from one system. For a typical two-storey home of 2,000 to 3,500 sq ft, a well-designed two-zone setup, main floor plus basement and second floor, usually works well with variable-speed equipment. It needs careful design so the system does not choke when only one small zone calls.
A second system makes sense in larger homes, in long or spread-out layouts, or when the upper floor has very different loads. This 5457 sq ft plan with four bedrooms, two storeys and a basement, or a 4295 sq ft modern home with five bedrooms, are the kind of size where a separate upstairs unit in an interior closet or conditioned attic space is worth pricing.
Time: part of the design phase. Cost: zoning roughly $2,000 to $5,000; a second ducted system roughly $10,000 to $20,000 or more.
Step 9: Ask your HVAC designer these questions before framing
- Did you do a room-by-room CSA F280 calculation with our real windows and insulation?
- What airflow does each upstairs bedroom get, and is each on its own branch?
- How does air return from every bedroom with the door closed?
- Where exactly do the ducts rise to the second floor, and are all of them inside the insulated envelope?
- How is the room over the garage handled?
- What is the design static pressure, and does the equipment's blower match it?
- Why one system with zones, or why two systems?
- Will you balance the system and give us the measured airflow per room at handover?
Then insist on balancing after installation. A technician measures airflow at each register and adjusts the dampers. It typically costs $300 to $800 and takes half a day, and it is the step that turns a good design into a comfortable house.
Timeline at a glance
| Stage | Steps | Typical duration | Typical cost (CAD, 2025–2026) |
|---|---|---|---|
| Plan selection | Step 1 | Days to weeks | None |
| Loads and duct design | Steps 2 to 4 | 2 to 4 weeks | $800 to $2,500 |
| Chases, garage room, equipment choice | Steps 5 to 7 | 1 to 2 weeks, before framing | $1,000 to $9,000 in upgrades |
| Zoning or second system | Step 8 | Decided with the design | $2,000 to $20,000+ |
| Review and balancing | Step 9 | One meeting, half a day at the end | $300 to $800 |