Picture a January morning after a heavy snowfall. With a front-facing garage, the plow windrow lands right across your doors and the only place left for the snow is the lawn by the front walk. With a side-entry garage, the doors face the side yard, you have a wide paved apron to clear, and the snow goes onto open ground where it does not block anyone. On a wide suburban lot or an acreage, a side-load attached garage is one of the most practical layouts you can choose in Canada. It also needs more land and more planning than most people expect. This checklist covers what to check, in order, before you commit to a plan.
Stage 1: Confirm the lot can take a side-load garage
- Lot width. Add the width of the house, the 30 to 35 ft of backing space in front of the garage doors, and the side yard setback in your zoning bylaw. On many suburban lots this means a frontage of roughly 75 ft or more. Narrow infill lots rarely work.
- Turning apron. Cars need about 30 to 35 ft of clear pavement in front of the doors to back out and turn toward the street in one move. Less than that means three-point turns every day.
- Garage size. A two-car garage is usually about 22 to 24 ft deep. A three-car garage makes the apron wider, so check the whole paved area, not only the house footprint.
- Orientation. Doors facing south or west get sun on the apron and clear faster. Doors facing north can stay icy until spring.
- Grade. The apron should slope gently away from the garage doors so meltwater does not freeze against the slab or run under the door.
Before you fall for any plan, sketch the house on your survey or site plan with the apron drawn in at full size. If the paved area runs into the side yard setback, the layout will not get past the permit stage. On an acreage you have more room, but placement still matters: keep the apron where the prevailing winter wind will not drift snow straight back onto it.
Stage 2: Plan the mudroom and the way into the house
- Mudroom entry. In a side-load layout the garage usually connects to the house through a mudroom near the kitchen. Check that this room has a bench, a closet or lockers for winter coats and boots, and a floor that can handle slush.
- Laundry location. Many families put the laundry in or next to the mudroom so wet snow gear goes straight to the washer.
- Door between garage and house. The building code sets requirements for this door and the shared wall, including protection against exhaust fumes getting into the house. Confirm the details with your designer and the municipality.
- Steps. The garage slab sits lower than the main floor. Plan the steps and a landing so you are not carrying groceries up a steep stair.
- Front door. Because the garage doors no longer face the street, the front entry becomes the focus of the elevation. Check that a walkway from the driveway leads to it naturally.
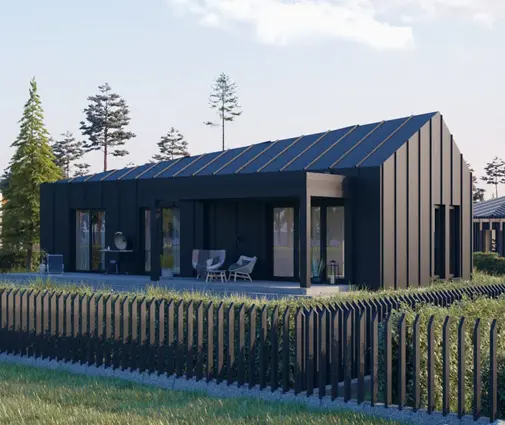
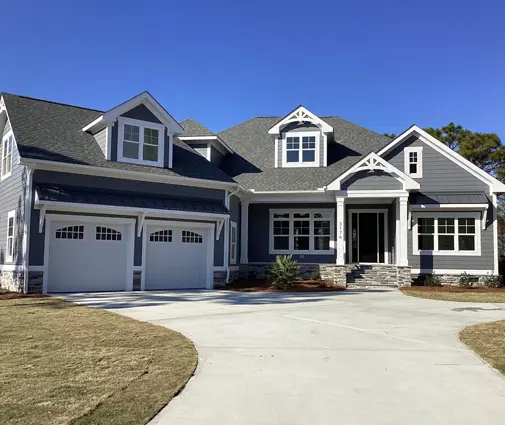
Walk through the plan as you would on a winter weeknight: car in, boots off, groceries to the kitchen. A one-storey layout like this 2,742 sq ft four-bedroom farmhouse bungalow with a two-car garage shows how much easier daily life gets when the garage, the mudroom and the kitchen sit on the same level. If you also want a full basement, this 1,899 sq ft three-bedroom Craftsman bungalow with a basement is a compact footprint that can be tested against a wide lot. More options are in the attached garage house plans.


Stage 3: Design the driveway for snow and block heaters
- Snow storage. Leave unpaved ground beside the apron and along the driveway where you or a contractor can push snow. A side-load layout usually has more of this space than a front-facing one.
- Plow access. If you hire a plow service, the driveway needs to be wide enough at the turn for their truck or tractor, and the apron should have no tight corners.
- Block heater outlets. In the Prairies and the North, cars parked outside need plug-ins. Put exterior outlets on the side wall of the garage or on a post near the apron, where cords will not cross the walkway.
- Visitor parking. The apron doubles as parking. Check that a parked car does not block the garage doors or the route for the plow.
- Paving cost. A side-load garage needs more pavement. In 2025 residential asphalt was often quoted at roughly $4 to $8 CAD per sq ft depending on the region and site, with concrete costing more, so an extra 700 to 1,000 sq ft of apron adds up. Get local quotes.
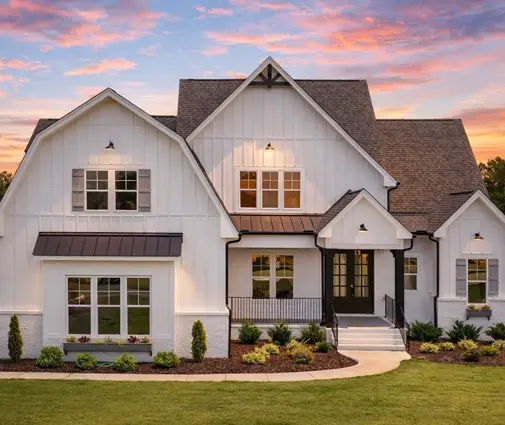
On larger homes the paved area grows fast. A plan like this 4,176 sq ft two-storey Modern Craftsman with a three-car garage or this 3,912 sq ft five-bedroom Modern Farmhouse with a three-car garage needs a wide apron to work well with side-loaded doors. Draw the driveway, the snow storage areas and the outlets on the site plan at the same time as the house, not after. You can compare similar layouts in the 3-car garage house plans.


Stage 4: Check setbacks, bylaws and architectural controls
- Side yard setbacks. Some bylaws limit how much of the side yard can be paved, or set a minimum distance between a driveway and the lot line.
- Curb cuts. Municipalities often limit the width and number of driveway entrances. Check how wide your access can be at the street.
- Corner lots. On a corner lot, the side-load garage may face the flanking street, which can trigger different setbacks and sightline rules.
- Architectural controls. Many new subdivisions have design guidelines that cover garage placement, materials and the street elevation. Some favour side-load garages, others restrict them. Get the guidelines before you choose a plan.
- Rural access. On an acreage, a new entrance from a road with a ditch may need an approach permit and a culvert from the municipality or the road authority.
- Lot coverage. Some zones count the garage in the maximum lot coverage. Wider homes with side-load garages can hit this limit.
Rules differ from one municipality to the next and change over time, so call the planning department early, before you pay for drawings. If the bylaws are tight, an angled garage can sometimes keep the doors off the street with a smaller apron. Ask your designer or an architect to confirm what the local rules allow.
Stage 5: Match the plan to how you live
- Number of bays. Two bays suit most families. A third bay is useful for a truck, a snowblower, a lawn tractor or a workshop on an acreage.
- Garage depth. If you drive a full-size pickup, ask for extra depth so the door closes with room to walk around.
- Windows on the street side. The garage wall that faces the street should look like part of the house, with windows and the same siding or stone.
- Storage. Plan wall space or a mezzanine for bikes, tires and seasonal gear.
A two-storey home such as this 3,251 sq ft four-bedroom Modern Craftsman with a two-car garage keeps the footprint narrower, which leaves more of the lot for the apron and snow storage. A bungalow spreads out more, so it suits acreages and very wide lots. Choose the footprint first, then fit the garage.
Common mistakes
- Drawing the apron shorter than 30 ft to make the house fit, then struggling to back out every day.
- Leaving no unpaved ground for snow, so it piles up against the garage doors.
- Facing the garage doors north into the wind without planning for ice and drifts.
- Forgetting block heater outlets until after the siding is on.
- Choosing a plan before reading the subdivision's architectural guidelines.
- Putting the garage entry far from the kitchen, so groceries cross the whole house.