Most first-time buyers open a plan set, look at the main floor, count the bedrooms and stop there. That is like judging a car by its brochure photo. The floor plan answers only some of your questions. The elevations, the building section and the foundation plan answer the rest, and in Canada, where most new homes sit on a full basement and carry real snow loads, those other sheets matter.
This guide compares the five kinds of drawings in a typical Canadian plan set. For each thing you need to check, it tells you which sheet to read and what to look for. You do not need to learn drafting. You need to know where the answers are.
The five sheets at a glance
| Sheet | What it shows | Typical scale | Best for checking | Weak at |
|---|---|---|---|---|
| Floor plans | Each storey seen from above, cut about 4 ft above the floor | 1/4" = 1'-0" (or 1:50) | Room sizes, door swings, window positions, circulation | Heights, anything vertical |
| Elevations | Each face of the house: front, rear, left, right | 1/4" = 1'-0" or 1/8" = 1'-0" | Window sizes and sill heights, roof pitch, grade line, exterior finishes | Interior layout |
| Building section | A vertical slice through the whole house | 1/4" = 1'-0" or larger | Ceiling heights, stair headroom, wall and roof assemblies, insulation | Room-by-room detail |
| Foundation / basement plan | Footings, foundation walls, posts, beams, basement rooms | 1/4" = 1'-0" | Basement layout, beam and post locations, window wells | Upper floors |
| Details and notes | Enlarged connections, framing notes, schedules | 1" = 1'-0" and up | Structure (TJI, LVL), stairs, assemblies, general notes | The big picture |
Now the head-to-head, one question at a time.
Room sizes: floor plan versus everything else
Rooms on a floor plan are usually labelled with two numbers, for example 12'-6" x 14'-0". The first number is typically the width as you read the sheet, but conventions vary, so check against the dimension strings around the outside of the drawing. Those strings run in three layers: overall length, wall-to-wall segments, and window and door openings.
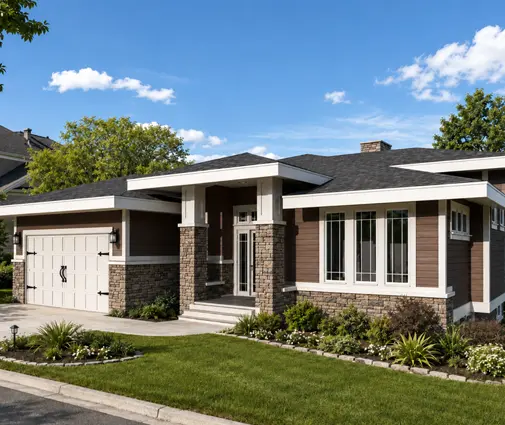
Two traps. First, the room label is often measured to the face of the framing or to the centre of the walls, not to the finished drywall, so a "12 ft" room may feel 4 to 6 inches smaller once finished. Second, a label can include a closet or a bay window. Measure your current furniture and draw it to scale on a printout. A compact bungalow such as this three-bedroom, one-storey plan of 1384 sq ft is a good test: at that size, every foot of hallway is a foot taken from a bedroom.
Verdict: the floor plan wins clearly, but trust the dimension strings over the room labels.
Ceiling heights: section versus elevations
A floor plan may show a note such as "9' CLG" or a dashed line for a vaulted area, but the real answer is on the building section. It shows each floor-to-ceiling height, the floor system depth between storeys and the roof framing above. If the plan advertises a vaulted great room, the section tells you whether it is a true vault or a modest raised ceiling, and how the insulation fits above it. If cathedral ceilings appeal to you, browse plans with vaulted ceilings and then ask for the section before you decide.
Elevations show the floor levels as horizontal lines with heights noted at the side, which is enough to compare overall heights but not to judge rooms.
Verdict: the building section wins. Never accept ceiling heights from marketing copy alone.
Stair headroom: section versus floor plan
On the floor plan, stairs are drawn as a series of lines with an arrow marked "UP" or "DN" and a break line where the cut passes through them. You can count the risers there, but you cannot see headroom. The section shows the stair in profile with the floor above it, and that is where a too-tight opening shows up.
Part 9 of the National Building Code, and the provincial codes based on it, set a minimum clear headroom over stairs in houses, commonly cited as about 1.95 m (roughly 6 ft 5 in), along with limits on riser height and tread depth. Confirm the current numbers for your province with your municipality or designer. Stock plans drafted for other markets sometimes need the stair reworked to meet Canadian rules, especially the basement stair, which is often squeezed under the main stair.
Verdict: the section wins; the floor plan only tells you where the stair goes.
Windows and doors: elevations versus floor plans
Doors on a floor plan are drawn as a thin leaf with a quarter-circle arc showing which way they swing. Check that a door does not hit a toilet, a cabinet or another door, and that the swing into a bedroom does not block the bed wall. Sliding and pocket doors appear as parallel lines with no arc.
Windows on the plan show only position and width. Each one usually carries a tag, either a letter or number keyed to a window schedule, or a size code such as 3050, meaning 3'-0" wide by 5'-0" high. The elevations show the actual shape, the sill height and how the windows line up across the facade.
In Canada, bedroom windows matter for safety. Bedrooms without sprinklers generally need at least one window with an unobstructed opening of a minimum area and minimum dimension set by the code, and that includes basement bedrooms, which may also need a window well of a minimum size. Check the numbers with your building department, because many stock plans show basement windows that are too small for a bedroom.
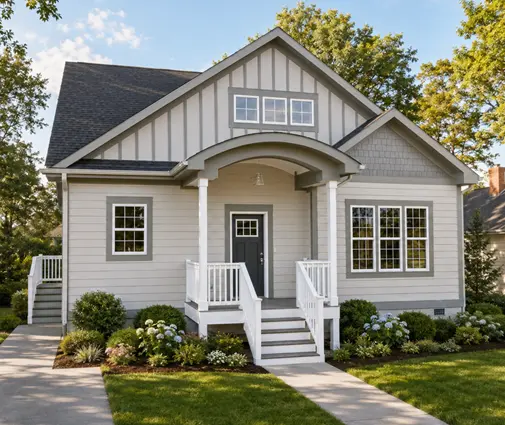

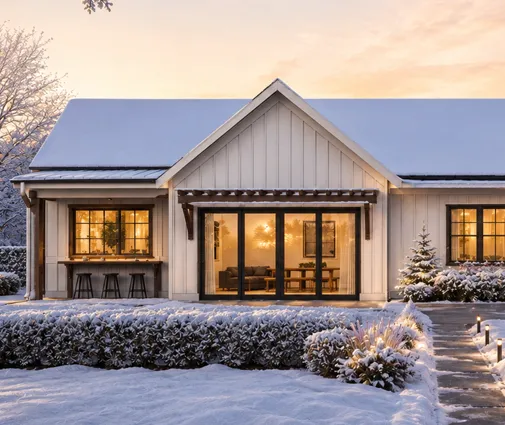
Two-storey plans like this three-bedroom cottage-style home of 1744 sq ft or this larger four-bedroom farmhouse of 2472 sq ft are good practice: compare the front elevation with the upper floor plan and see how each bedroom window lands on the facade. More examples are in the two-storey plans collection.
Verdict: a draw. Use the floor plan for swings and positions, the elevations and the window schedule for sizes.
The basement: foundation plan versus main floor plan
Because frost depth pushes footings well below grade in most of Canada, a full basement is often a small extra cost over a deep crawl space, and many families plan to finish it. The foundation plan shows the poured concrete or ICF walls, the footings, the strip and pad footings under posts, the steel or wood beam (often drawn as a dashed line with a note), and any bearing walls.
Read it with a pencil. Where are the posts? A post in the middle of a future family room is hard to move later. Where are the furnace, water heater and HRV? Is there a rough-in for a basement bathroom? Where can windows go, given the grade line on the elevations? A five-bedroom Craftsman bungalow of 1607 sq ft with a basement and a three-bedroom, 1522 sq ft one-storey plan with a basement show how much living space a bungalow can gain below grade. At the other end, a four-bedroom mountain-style home of 4571 sq ft on one storey with a basement shows how a large footprint changes the beam and post layout.


If the plan you like has no basement, it can usually be adapted, but the stair location, the main floor framing and the mechanical layout all change. The plans with a basement collection is a better starting point.
Verdict: the foundation plan wins, but always read it next to the main floor plan above it.
Structure and notes: details versus the plans themselves
Framing notes are where the abbreviations live. The ones buyers see most often:
- TJI: a brand of engineered wood I-joist, often used on drawings as shorthand for any I-joist. A note like "11 7/8" TJI @ 16" o.c." gives the depth and the spacing on centre.
- LVL: laminated veneer lumber, used for beams and headers over wide openings. "2-ply 1 3/4" x 11 7/8" LVL" means two pieces fastened together.
- o.c.: on centre, the spacing of studs, joists or rafters.
- 2x6 @ 16" o.c.: the typical exterior wall stud in much of Canada, leaving room for higher R-value insulation.
- Wall types: often tagged with a letter or number and described in a legend, for example exterior wall, interior partition, party wall or foundation wall, each with its layers listed.
The section and details also show the assemblies: the R-value of the walls and roof, the air and vapour barrier, the sheathing. Here a stock plan is a starting point, not a final answer. Snow loads, energy rules such as the BC Energy Step Code, and requirements for who may prepare permit drawings (Ontario, for instance, has a designer qualification system) differ by province and municipality. Expect a local designer or engineer to review and adapt the structure and the energy details before the permit.
Verdict: the details and notes win, and they are the sheets most likely to need local changes.
Dimensions: imperial versus metric
Most Canadian residential drawings are in feet and inches: 14'-6" means 14 feet 6 inches, and areas are given in square feet. Lumber and sheet goods follow imperial sizes. Codes, on the other hand, are written in metric, so you may see headroom, window openings or guard heights quoted in millimetres. Some designers put both. When you compare a plan to a code requirement, convert carefully: 1 ft is 304.8 mm, and 1 m² is about 10.76 sq ft.
Verdict: read the plan in imperial, check the code in metric, and never scale a printed PDF with a ruler; use the written dimensions.
Who should choose what
- If you are comparing many plans quickly: start with the floor plans and the front elevation. Shortlist on layout and look.
- If ceiling height or a vaulted room is a priority: ask for the building section before buying.
- If you plan to finish the basement now or later: study the foundation plan for post locations, window sizes and mechanical space.
- If you are building in a heavy snow area or under a strict energy code: look at the details and notes, and budget for a local designer or engineer to adapt them.
- If you have older parents or want to age in place: check door widths and swings on the floor plan and the stair on the section.
- If you are on a tight lot: compare the overall dimension strings with your setbacks before you fall for a layout.
Read the sheets together, mark up a printout, and bring your questions to the person who will prepare your permit drawings. A plan you understand is a plan you can change before it costs money to change it.