It is a February afternoon, minus 24 with the wind, and a couple with two school-age kids is standing at the edge of a five-acre parcel in a central Alberta county. The realtor's photos were taken in July: green grass, a line of old poplars, a gentle rise near the road. Today the rise is blown bare and the low corner by the trees holds a drift taller than their pickup. That one visit taught them more about where to put their house than any brochure. Here is how their project went, from the land to the first winter, and what they learned at each step.
Buying the land in the wrong season, on purpose
Most people shop for acreages in summer. This family had seen friends build a beautiful bungalow whose driveway filled in after every storm, so they insisted on walking the land in winter before making an offer. They noticed three things. The snow on the open field was rippled in long ridges running from the northwest, which told them where the prevailing winter wind came from. The old poplar row along the north line had a deep drift on its sheltered side, and the clear zone just beyond it. And the highest ground was close to the road, which looked convenient for a short driveway.
They also called the county before signing. On many rural parcels you need a development permit as well as a building permit, and the county can set minimum setbacks from the road, from property lines and sometimes from wetlands or slopes. Those setbacks shrink the area where the house can go, so it made sense to know them before falling in love with any particular spot.
Lesson: visit the land at least once in winter and once in spring melt if you can. Read the drifts, ask the county for setbacks and permit steps, and only then think about where the house goes.
The site visit that set the rules
Once the land was theirs, they went back with a notebook, a compass app, stakes and a long tape. A local designer suggested they treat it as a checklist rather than a stroll, and that list became the brief for everything that followed:
- Note the direction of the prevailing winter wind, from drift shapes, bent trees and neighbours' advice, then confirm it with Environment Canada climate data for the nearest station.
- Mark where snow piles up: behind tree rows, in ditches, on the downwind side of any building or rise.
- Find true south (a compass gives magnetic north, and the difference in Alberta is significant) and look for anything that will shade the winter sun.
- Locate the high and low points, where water sits in spring, and any sloughs or wet spots.
- Ask where the well and septic field can go, since provincial rules set separation distances between them and from the house.
- Check the road access: where the county allows the approach, whether a culvert is needed, and where the school bus stops.
- Note views worth keeping and the direction of neighbours' yards.
By the end of the afternoon the parcel had a clear shape: wind from the northwest, drift zone along the north tree line, highest dry ground in the middle-west, the best views to the south and east.
Lesson: a written site checklist turns a vague feeling about the land into rules for the plan. True south, wind direction, drift zones and water are the four facts that matter most in a Canadian winter.
Choosing a plan with the sun in mind
The family wanted a bungalow over a full basement. Frost depth makes a deep foundation necessary anyway, and finishing the lower level later would give them a rec room and spare bedrooms at a lower cost per square foot than building them above grade. They browsed the house plans with a basement and narrowed it to three.
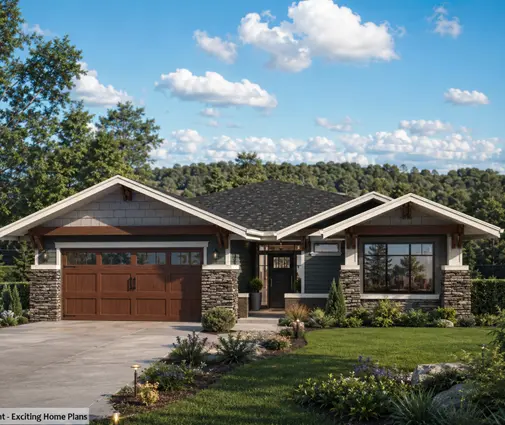
The first was a 1522 sq ft Craftsman bungalow with 3 bedrooms and a 2-car garage, simple and affordable to heat. The second was a 1669 sq ft one-storey plan with 4 bedrooms, which gave each child a room and left one for an office. The third was a 1661 sq ft European-style bungalow, also with 4 bedrooms, whose living area ran along one long wall.
What decided it was not the elevations but the orientation. They wanted the kitchen, dining and great room facing south, where low winter sun can come deep into the house through good windows, and the garage, mudroom, laundry and closets on the north and northwest side as a buffer against the wind. A plan with the living spaces along one long side and the service rooms on the other fits that idea best. They also checked that the south windows would get proper overhangs so the summer sun does not overheat the rooms.


Lesson: choose a plan whose long living side can face within roughly 20 degrees of true south, and whose garage and service rooms can sit toward the winter wind. A compact footprint is also easier to insulate and heat.
Garage doors, the driveway and where the snow goes
Their first sketch put the house close to the road and the garage doors facing southeast, right in the lee of the house. The designer pointed out the problem: wind scours the windward side of a building and drops snow on the downwind side, often in the inside corner of an L. Garage doors in that spot would be shovelled every morning. The same goes for a driveway that crosses the wind or runs right behind a tree row: snow falls out of the air where the wind slows.
The fix did not need a different plan. The plan they chose could be ordered mirrored, which moved the garage to the other end of the house, and the whole footprint was turned so the garage doors faced east, out of the main drift path. The driveway came in from the road in a fairly straight line roughly parallel to the northwest wind, which tends to blow it clean instead of filling it. They kept it short, because every extra hundred feet is more gravel, more culverts and more snow to clear every winter for decades, whether you plow it yourself or pay a contractor.
They had also looked at bigger options, such as a 3507 sq ft two-storey farmhouse with 4 bedrooms and a 3-car garage and a 2992 sq ft one-storey modern farmhouse with a 4-car garage. The same rules applied: on plans with an angled garage or a long wing, the doors should face away from the drift corner, and a side-entry layout can be rotated to put the doors on the sheltered but not drift-prone side.
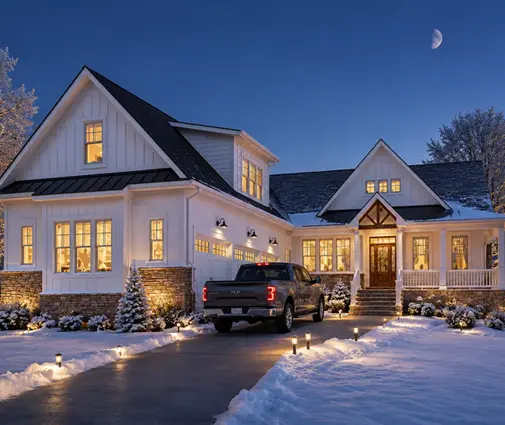


The old poplar row became a real asset once they understood it. A shelterbelt works best when there is open ground between it and the yard, so the drifts land there and not on the house. Common prairie advice is to keep the house and driveway somewhere around 100 to 200 feet downwind of a dense belt; their poplars were closer than that, so they moved the house south a little and planned a second row of spruce farther out to the northwest.
Lesson: do not put garage doors or the driveway in the downwind corner of the house or right behind a windbreak. Mirroring or rotating the plan is cheaper than fighting drifts every winter; just make sure the permit drawings show the version you will actually build.
Setting the house high enough
The last decision was height. The parcel was mostly flat clay, and in April the low corner held a shallow pond. The family placed the house on the highest dry ground and asked the builder to set the top of the foundation so that finished grade could slope away on all sides, typically several inches of drop over the first ten feet, with swales carrying meltwater around the house toward the low corner. The driveway was crowned and slightly raised as well, so it would not turn into a channel in spring.
They had briefly considered a 1607 sq ft Craftsman bungalow with 5 bedrooms and a basement, and the same reasoning applied there: a full basement is only an asset if it stays dry. Weeping tile, a sump, window wells kept clear of drift zones and downspouts carried well away from the walls were all part of the site plan, not afterthoughts. The septic field went downslope and the well upslope, at the distances the provincial rules required, which their installer confirmed.
Lesson: on a flat or clay lot, the elevation of the house matters as much as its orientation. Pick the high ground, grade away from the foundation, and check drainage, well and septic placement with your builder and the local authority before the excavator arrives.
The first winter in the new house
They moved in at the end of October. By January the results were easy to see. On sunny days the great room warmed up on its own by early afternoon and the heat pump barely ran. The northwest storms piled snow along the poplars and out in the field, but the east-facing garage doors stayed mostly clear, and the straight driveway usually needed one pass of the tractor instead of three. In the spring the meltwater went exactly where the swales sent it: to the low corner, not to the basement.
None of it came from an unusual or expensive house. It came from an ordinary bungalow plan, mirrored and turned to suit the land, with a little patience at the beginning.
Lesson: the right spot and orientation cost almost nothing on paper and pay back every winter. Before you finalize a plan, walk the land with the checklist, then ask an architect or designer, and the municipality or county, to confirm the details for your own parcel.