Most families start cutting their budget too late. The builder's quote comes in high, and the first things to go are the quartz countertops, the hardwood and the deck. Those cuts are visible every day, and they rarely save as much as people hope. The decisions that really drive the price of a Canadian house are made earlier, on paper: the shape of the foundation, the roof, where the plumbing runs and how well the dimensions fit standard lumber and sheet goods.
The steps below follow the order in which you would normally choose and adapt a house plan. The savings are rough ranges for a 1,500 to 2,000 sq ft home, based on typical 2025–2026 pricing. Many builders quoted somewhere around $250 to $450 per square foot for new single-family construction in that period, and more in Greater Vancouver, the GTA and remote areas. Your numbers will differ by region and by trade availability, so treat these as a way to compare options, not as a quote.
Step 1: Set the size from the budget, not from a wish list
What to do: Divide the money you can actually spend on construction by a realistic local cost per square foot. That gives you a target area before you open the catalog. Then list the rooms you need and the rooms you would like, and keep them on separate lists.
Every square foot you do not build is the biggest saving available. At $300 per sq ft, trimming a plan from 1,900 to 1,600 sq ft takes roughly $90,000 off the build. Good layouts in the 1,500 to 2,000 sq ft range often fit three or four bedrooms without wasted hallways. One example is a one-storey Craftsman plan of 1491 sq ft with five bedrooms and a basement, which shows how much a compact plan can hold.
How long: 1 to 2 weeks. Cost: nothing but time, plus a meeting with your lender for pre-approval.
Step 2: Pick a simple footprint with few foundation corners
What to do: When you browse plans, look first at the outline of the main floor. A rectangle, or a rectangle with one modest bump-out, is the most economical shape to build. Every extra corner means more concrete forming, more footing work, more framing at the walls above and more roof complexity.
In Canada this matters more than in warmer markets. Footings must sit below the frost line, often 4 ft (about 1.2 m) or deeper depending on the region, so every jog in the outline is a deep jog. Builders commonly estimate around $1,000 to $3,000 per extra pair of corners once you add forming, waterproofing, framing and roofing. Going from a heavily articulated L- or U-shaped plan to a clean rectangle can save $8,000 to $20,000. It also makes the house easier to air-seal, which you will need later.
How long: part of your plan search, about 1 to 3 weeks. Saving: roughly $8,000 to $20,000.
Step 3: Decide between a bungalow, a two-storey and a full basement
What to do: Compare how much foundation and roof each option needs for the same living area. A two-storey home puts the same floor area on half the foundation and under half the roof. A bungalow is easier to live in later but costs more per square foot of the shell.
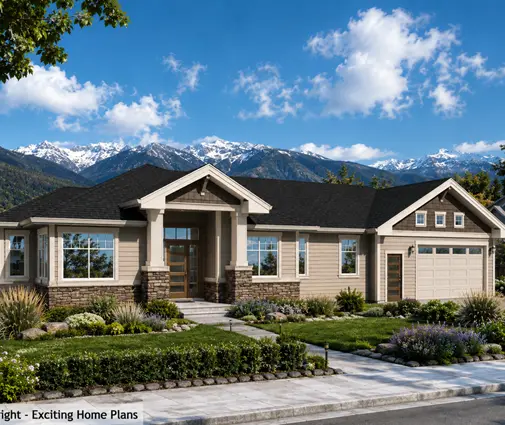
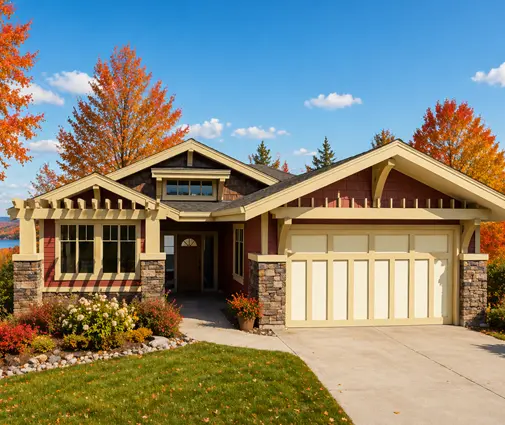
The Canadian twist is the basement. Because footings must go below frost depth anyway, digging a few more feet for a full basement adds a large amount of space for relatively little extra money. An unfinished basement is often one of the cheapest square footages in the house, and you can finish it later when your budget allows. Plans such as this 1575 sq ft three-bedroom bungalow with a basement or a 1577 sq ft Modern Craftsman ranch with three bedrooms and a basement keep the main floor modest and leave the lower level for future rooms.

How long: 1 week of comparison. Saving: a two-storey can save roughly 5 to 15 percent on the shell compared with a bungalow of the same area. Leaving the basement unfinished defers $30,000 to $70,000 or more of finishing work.
Step 4: Keep the roof simple and truss-friendly
What to do: Favour a straight gable roof with one ridge and a common pitch. Engineered trusses for a simple gable are fast to order and quick to set, often in a single day for a modest house. Hips, valleys, dormers, multiple ridges and vaulted ceilings each add labour, flashing and potential leak points.
Your roof must also carry the snow load set for your location under the building code, which varies widely between, say, the Fraser Valley and northern Ontario. A plain gable sheds snow predictably and avoids the valleys where ice dams like to form. Compared with a cut roof that has several valleys and dormers, a simple gable can save roughly $5,000 to $20,000 on framing and roofing.
How long: decided during plan selection. Truss design and delivery usually take 2 to 6 weeks once ordered. Saving: roughly $5,000 to $20,000.
Step 5: Stack and group the wet rooms
What to do: Check where the kitchen, bathrooms and laundry sit. In a good economical plan they back onto each other or sit directly above one another, so they share one main drain stack and short supply runs. In a two-storey house, the upstairs bathroom should be above the main-floor powder room or kitchen. In a bungalow with a basement, keep the wet rooms on one side of the house so that a future basement bathroom can tie in easily.
Plumbers price by fixture and by run. Scattering bathrooms at the corners of the house adds venting, extra stacks and longer hot-water lines. Grouping them typically saves $3,000 to $10,000 and makes a future basement bathroom rough-in cheaper too.
How long: a few hours to check on the plans, or small changes by your designer. Saving: roughly $3,000 to $10,000.
Step 6: Use 2-ft modules, 4x8 sheets and standard wall heights
What to do: Look at the overall dimensions. Canadian wood framing is laid out on 16- or 24-inch centres, and sheathing, subfloor and drywall come mostly in 4x8 ft sheets. A house measuring 28 x 48 ft uses full sheets and full joist spans with little waste. A house measuring 29 ft 3 in x 47 ft 5 in produces offcuts on every wall and floor.
- Overall dimensions in multiples of 2 ft, ideally 4 ft.
- Floor depths that suit standard I-joist or truss spans without odd mid-span beams.
- Walls of 8 or 9 ft that match stock stud and drywall lengths rather than custom heights.
The direct saving on materials and labour is usually modest, around $2,000 to $8,000. However, it adds up with every trade and is easy to get when you choose the plan or make minor adjustments.
How long: a few days with your designer if dimensions need tweaking. Saving: roughly $2,000 to $8,000.
Step 7: Choose standard window and door sizes
What to do: Ask your designer or window supplier for their stock or standard sizes, and adjust the plan to match. Custom-sized and specially shaped units, such as arched tops, trapezoids and very large fixed panes, can cost noticeably more per square foot of glass. They also take longer to arrive. Keep the number of window types small and line windows up with the stud layout so that headers stay simple.
In a cold climate, more glass also means more heat loss, so the energy model may ask for better-performing (and pricier) windows. Bright, well-placed standard windows usually beat a wall of custom glazing on both cost and comfort. Switching from custom to standard sizes often saves $3,000 to $15,000 on a typical house.
How long: 1 to 2 weeks to confirm sizes with a supplier. Saving: roughly $3,000 to $15,000.
Step 8: Plan a simple, airtight envelope and compact mechanicals
What to do: Energy rules are tightening across Canada. Examples include the BC Energy Step Code, the energy requirements in Ontario's OBC and Quebec's code, and the energy tiers in the newer national codes. A simple shape helps here: fewer corners and roof intersections mean fewer places for air to leak. That makes it easier and cheaper to pass the blower-door test and reach the required R-values.
A compact plan also shortens duct runs for the furnace or heat pump and for the HRV that most new homes now need. Put the mechanical room near the centre of the basement, close to the wet rooms. Small, efficient homes like a 975 sq ft two-bedroom cottage-style bungalow show how little envelope you need to heat when the plan is tight. Savings vary widely, but builders often see $3,000 to $10,000 less in ductwork, air-sealing labour and equipment sizing, plus lower heating bills for decades.
How long: an energy model or compliance check usually takes 1 to 3 weeks. Cost: energy advisor and modelling fees are commonly in the $1,000 to $3,000 range in 2025–2026. Saving: roughly $3,000 to $10,000 at build time.
Step 9: Review the plan with a builder before the permit
What to do: Before you submit drawings to the municipality, ask one or two local builders to price the plan as drawn. Ask them directly where the cost is hiding: odd spans, a complicated roof, expensive structural beams, or wet rooms that are too far apart. Small changes at this stage are cheap. The same changes after permit can mean revised drawings, a resubmission and weeks of delay.
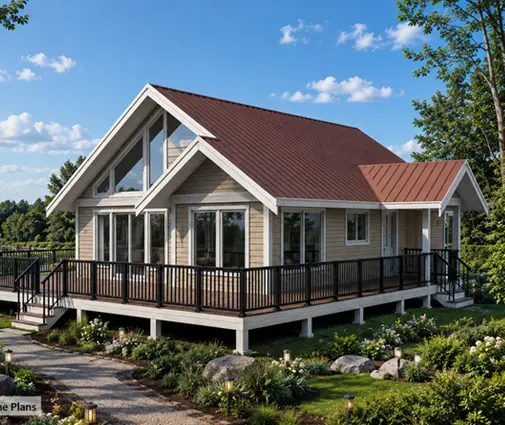
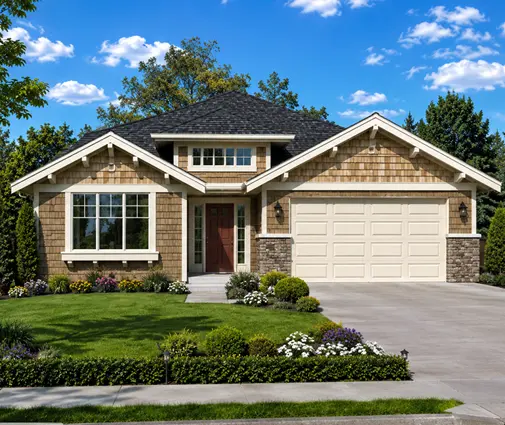
When you compare catalog plans, quick signs of an economical design are a rectangular outline, one main roof ridge, clustered bathrooms, round overall dimensions and a basement for future space. Plans such as a 2150 sq ft two-storey Modern Farmhouse with three bedrooms and a 1588 sq ft four-bedroom Craftsman bungalow with a basement are good starting points for that kind of review.

How long: 2 to 4 weeks for builder feedback. Municipal permit review then commonly takes from a few weeks to several months depending on the city. Cost: design revisions typically run from a few hundred to a few thousand dollars. Confirm current permit fees and local requirements with your municipality and your designer.
Timeline at a glance
| Step | Typical time | Rough saving or cost (CAD, 2025–2026) |
|---|---|---|
| 1. Size from budget | 1–2 weeks | Biggest lever: about $300 per sq ft not built |
| 2. Simple footprint | 1–3 weeks | Save $8,000–$20,000 |
| 3. Storeys and basement | 1 week | 5–15% on the shell; defer $30,000–$70,000+ of finishing |
| 4. Simple gable roof | During plan choice; trusses 2–6 weeks | Save $5,000–$20,000 |
| 5. Stacked wet rooms | Hours to days | Save $3,000–$10,000 |
| 6. 2-ft modules, standard sheets | A few days | Save $2,000–$8,000 |
| 7. Standard windows and doors | 1–2 weeks | Save $3,000–$15,000 |
| 8. Simple envelope and mechanicals | 1–3 weeks | Costs $1,000–$3,000 in modelling; saves $3,000–$10,000 |
| 9. Builder review before permit | 2–4 weeks, plus permit time | Costs a few hundred to a few thousand in revisions |
Taken together, these choices can realistically take tens of thousands of dollars off a Canadian build without touching the finishes you will see and use every day. Make them on paper, while changing a line costs nothing.



