Here is a common mistake: a family buys a stock plan, sketches in a bigger kitchen island, a third garage bay and an open wall between the living and dining rooms, and only learns at the permit counter that one of those "small" changes needs an engineer's stamp. That wall was carrying the floor above, and the permit is held up for weeks.
Almost every stock plan gets changed before it is built in Canada. That is normal. The trick is knowing early which changes are cheap paperwork and which ones reach into the structure. The steps below follow the order a modification project usually takes, with realistic time and cost ranges for 2026. Fees vary a lot between a small town in Saskatchewan and the Greater Toronto Area, so treat every number as a starting point. Confirm the rules with your municipality and your designer.
Step 1: Write down every change and sort it into three buckets
Before you call anyone, list everything you want to change. Then sort each item:
- Easy: mirroring (flipping) the plan, moving interior non-bearing partitions, changing cladding or colours, swapping fixtures, changing a closet into a pantry.
- Moderate: adding a garage bay, raising basement walls from 8 to 9 feet, upgrading exterior walls from 2x4 to 2x6, enlarging windows, adding a basement walkout.
- Structural: removing a bearing wall, stretching spans to open up a room, adding a vaulted ceiling, converting to a flat or low-slope roof in a heavy snow area, adding a storey.
Time: one or two evenings. Cost: nothing. This list becomes your brief for the designer, and a clear brief keeps revision fees down.
Step 2: Check the plan against your lot and your bylaw
Many "modifications" come from the lot rather than from your taste. Zoning bylaws set side yard setbacks, lot coverage, maximum height and sometimes garage width as a share of the frontage. A suburban lot of 40 to 50 feet may not take the plan as drawn. An acreage may need a septic field and a well placed before the house can be oriented.
Get a lot survey (or use the one from your purchase), and ask the planning department which zoning applies. If the house does not fit, it is cheaper to pick a narrower or one-storey plan now than to redraw a wide one. The narrow lot plans are a good place to compare.
Time: 1 to 3 weeks. Cost: a new survey with topography often runs about $1,500 to $4,000 in 2026. A zoning check at the counter is usually free.
Step 3: Handle the easy changes
Mirroring a plan so the garage sits on the other side is the classic cheap change. The drawings are reversed and the text is corrected. Moving a partition that carries no load, merging two small bedrooms into one, or changing vinyl siding to fibre cement or stone veneer are drafting jobs, not engineering jobs. Note that stone veneer adds weight at the foundation ledge, so tell your designer about it.
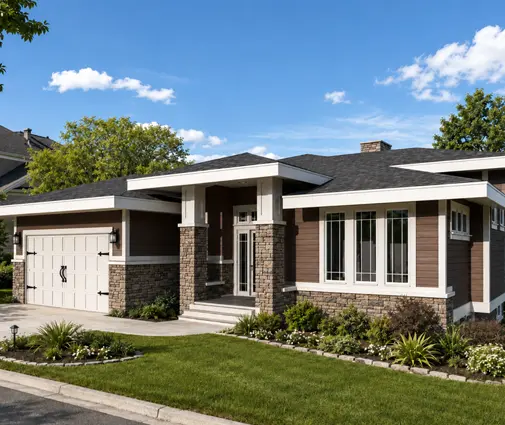
A compact bungalow is the easiest kind of plan to adjust. Take the 3-bedroom Prairie-style bungalow of 1634 sq ft with a basement and a two-car garage. Flipping it or reshaping the ensuite closet barely touches the structure.
Time: 1 to 2 weeks of drafting. Cost: roughly $300 to $1,500 for a short list of easy changes, depending on the designer.

Step 4: Plan the moderate changes
These changes go past layout. They touch the foundation, the walls or the roof, but they usually stay within the prescriptive rules of Part 9 of the building code that covers houses.
- Adding a garage bay. This means a new footing, a wider roof and often a new truss layout. If you are weighing it, look at plans already drawn with a three-car garage before extending a two-car one.
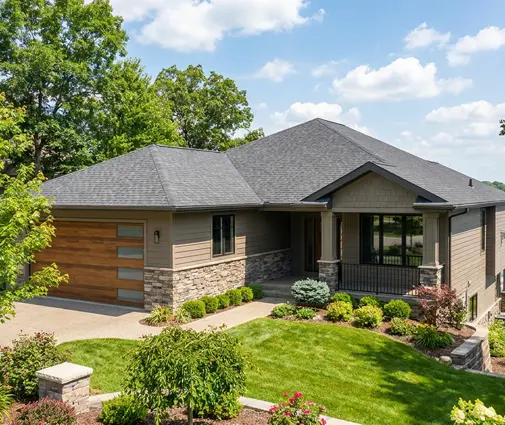
- Deepening the basement. With frost depths of about 4 feet or more across most of the country, a full basement is almost free headroom. Going from 8 to 9 feet changes the foundation wall height, the stairs and sometimes the reinforcement. The 4-bedroom bungalow of 1584 sq ft with a basement and the 5-bedroom Northwest-style plan of 1669 sq ft both show how much living space a finished lower level adds to a small footprint.
- Upgrading to 2x6 walls. Many stock plans are drawn with 2x4 exterior walls. In Canada, 2x6 framing (or 2x4 with continuous exterior insulation) is the usual way to reach the required R-values. The footprint grows slightly or the rooms shrink by a couple of inches, and the window and door jambs change.
Time: 2 to 4 weeks. Cost: often $1,500 to $5,000 for the drafting. A footing or lintel check by an engineer may add $500 to $1,500.
Step 5: Identify the structural changes
Some changes leave the span tables of Part 9 behind and need design under Part 4, meaning an engineer's calculations:
- Removing a bearing wall to create an open plan. The load has to go somewhere, usually into a flush LVL or steel beam with posts and point loads carried down to the footings.
- Longer spans for a great room or a garage without posts. These often need engineered joists, beams or trusses.
- A flat or low-slope roof under heavy snow. Design snow loads vary a lot between a Vancouver suburb and Sudbury or a BC mountain town. Flat roofs also collect drifts against parapets and taller walls. A modern design like the 3-bedroom contemporary plan of 2269 sq ft may need its roof structure checked carefully for your location. Plans in the flat roof category deserve the same care.
- Adding a storey or a vaulted ceiling where the original had a flat ceiling. This changes the wall bracing, the roof thrust and the loads on the foundation.
Time: 3 to 8 weeks. Cost: in 2026, an engineer's design of a single beam can cost about $500 to $1,500. A broader structural review of a modified house often runs $2,500 to $8,000 or more. Then add the cost of the beams and hardware themselves.
Step 6: Find out who has to stamp the drawings
This is where the rules differ most by province, so verify locally.
- Ontario: a designer who submits house drawings for a permit generally needs a BCIN (Building Code Identification Number) with the right qualification, unless they are an architect or a professional engineer. An owner designing their own house is an exception. Structural items beyond Part 9 still need a P.Eng.
- British Columbia, the Prairies and Atlantic Canada: house plans are often prepared by building designers. The municipality decides when it wants sealed engineering, which is commonly the case for beams, retaining walls, unusual foundations and anything outside the prescriptive tables.
- Quebec: the rules on who may sign house plans are set by provincial professional legislation and depend on the project. Check with your municipality and a technologist or architect before you commit.
Roof trusses and engineered floor systems come with layouts sealed by the supplier's engineer. That covers the truss itself, not your bearing wall removal.
Time: a phone call to the building department. Cost: included in the fees above.
Step 7: Bring the plan up to the energy code
Any modified plan must meet the energy requirements where you build. In Ontario that means the compliance packages or modelling under SB-12. In British Columbia it means the Energy Step Code level your municipality requires, which usually involves an energy advisor, energy modelling and an airtightness test. Expect the drawings to show insulation values, an HRV or ERV, and often a heat pump. Large window walls in a mountain-style plan can push the model over the limit, so window changes belong in this step too.
Time: 1 to 3 weeks, in parallel with the drafting. Cost: energy modelling and advisor services commonly run about $1,000 to $3,000 in 2026, with testing on top.
Step 8: Review the revised set and apply for the permit
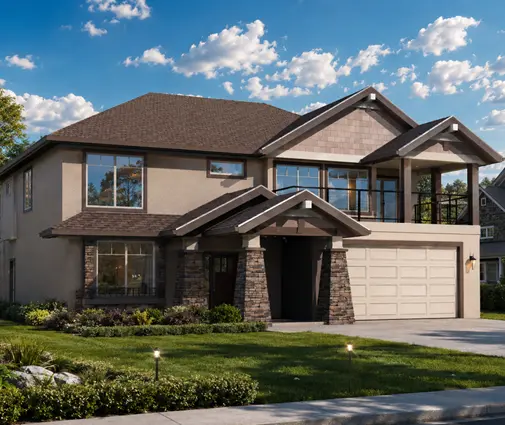
Read the final set line by line. Check room sizes, stair headroom, window sizes for egress from basement bedrooms, and the garage-to-house separation. Bigger family houses, like the 5-bedroom Craftsman plan of 2664 sq ft or the 4-bedroom Craftsman of 2359 sq ft with a two-car garage, have more places where a small change can ripple through.


Submit the drawings with the site plan, the truss layout (or a commitment to supply it), the energy documents and any engineering letters. Permit review times range from a couple of weeks in smaller municipalities to two months or more in busy urban ones.
Time: 2 to 10 weeks. Cost: permit fees are set by each municipality, often by floor area. Development charges in some Ontario and BC cities can far exceed the permit itself, so ask early.
Timeline at a glance
| Step | Typical time | Typical cost (CAD, 2026) |
|---|---|---|
| 1. List and sort changes | 1–2 evenings | $0 |
| 2. Lot and zoning check | 1–3 weeks | $1,500–4,000 for a survey |
| 3. Easy changes | 1–2 weeks | $300–1,500 |
| 4. Moderate changes | 2–4 weeks | $1,500–5,000, plus possible engineering |
| 5. Structural changes | 3–8 weeks | $2,500–8,000+ engineering |
| 6. Confirm who stamps | A few days | Included above |
| 7. Energy compliance | 1–3 weeks (parallel) | $1,000–3,000+ |
| 8. Review and permit | 2–10 weeks | Municipal fees vary |
The cheapest modification is the one you avoid by choosing well. If your list has more structural items than easy ones, look for a plan that is already closer to what you want.



